Employee Dashboard (self-service)¶
Who this is for: every employee — this is the area for your pay, requests, and leave. Time: ~5 minutes. You'll need: your login. (Getting started guide covers first-time setup.)
Your Employee Dashboard is your personal home in the HRIS. Everything here is about you: your pay, your requests, your leave, your profile. Nobody else sees your dashboard.
1. Your home page¶
Signing in takes you straight to your dashboard.
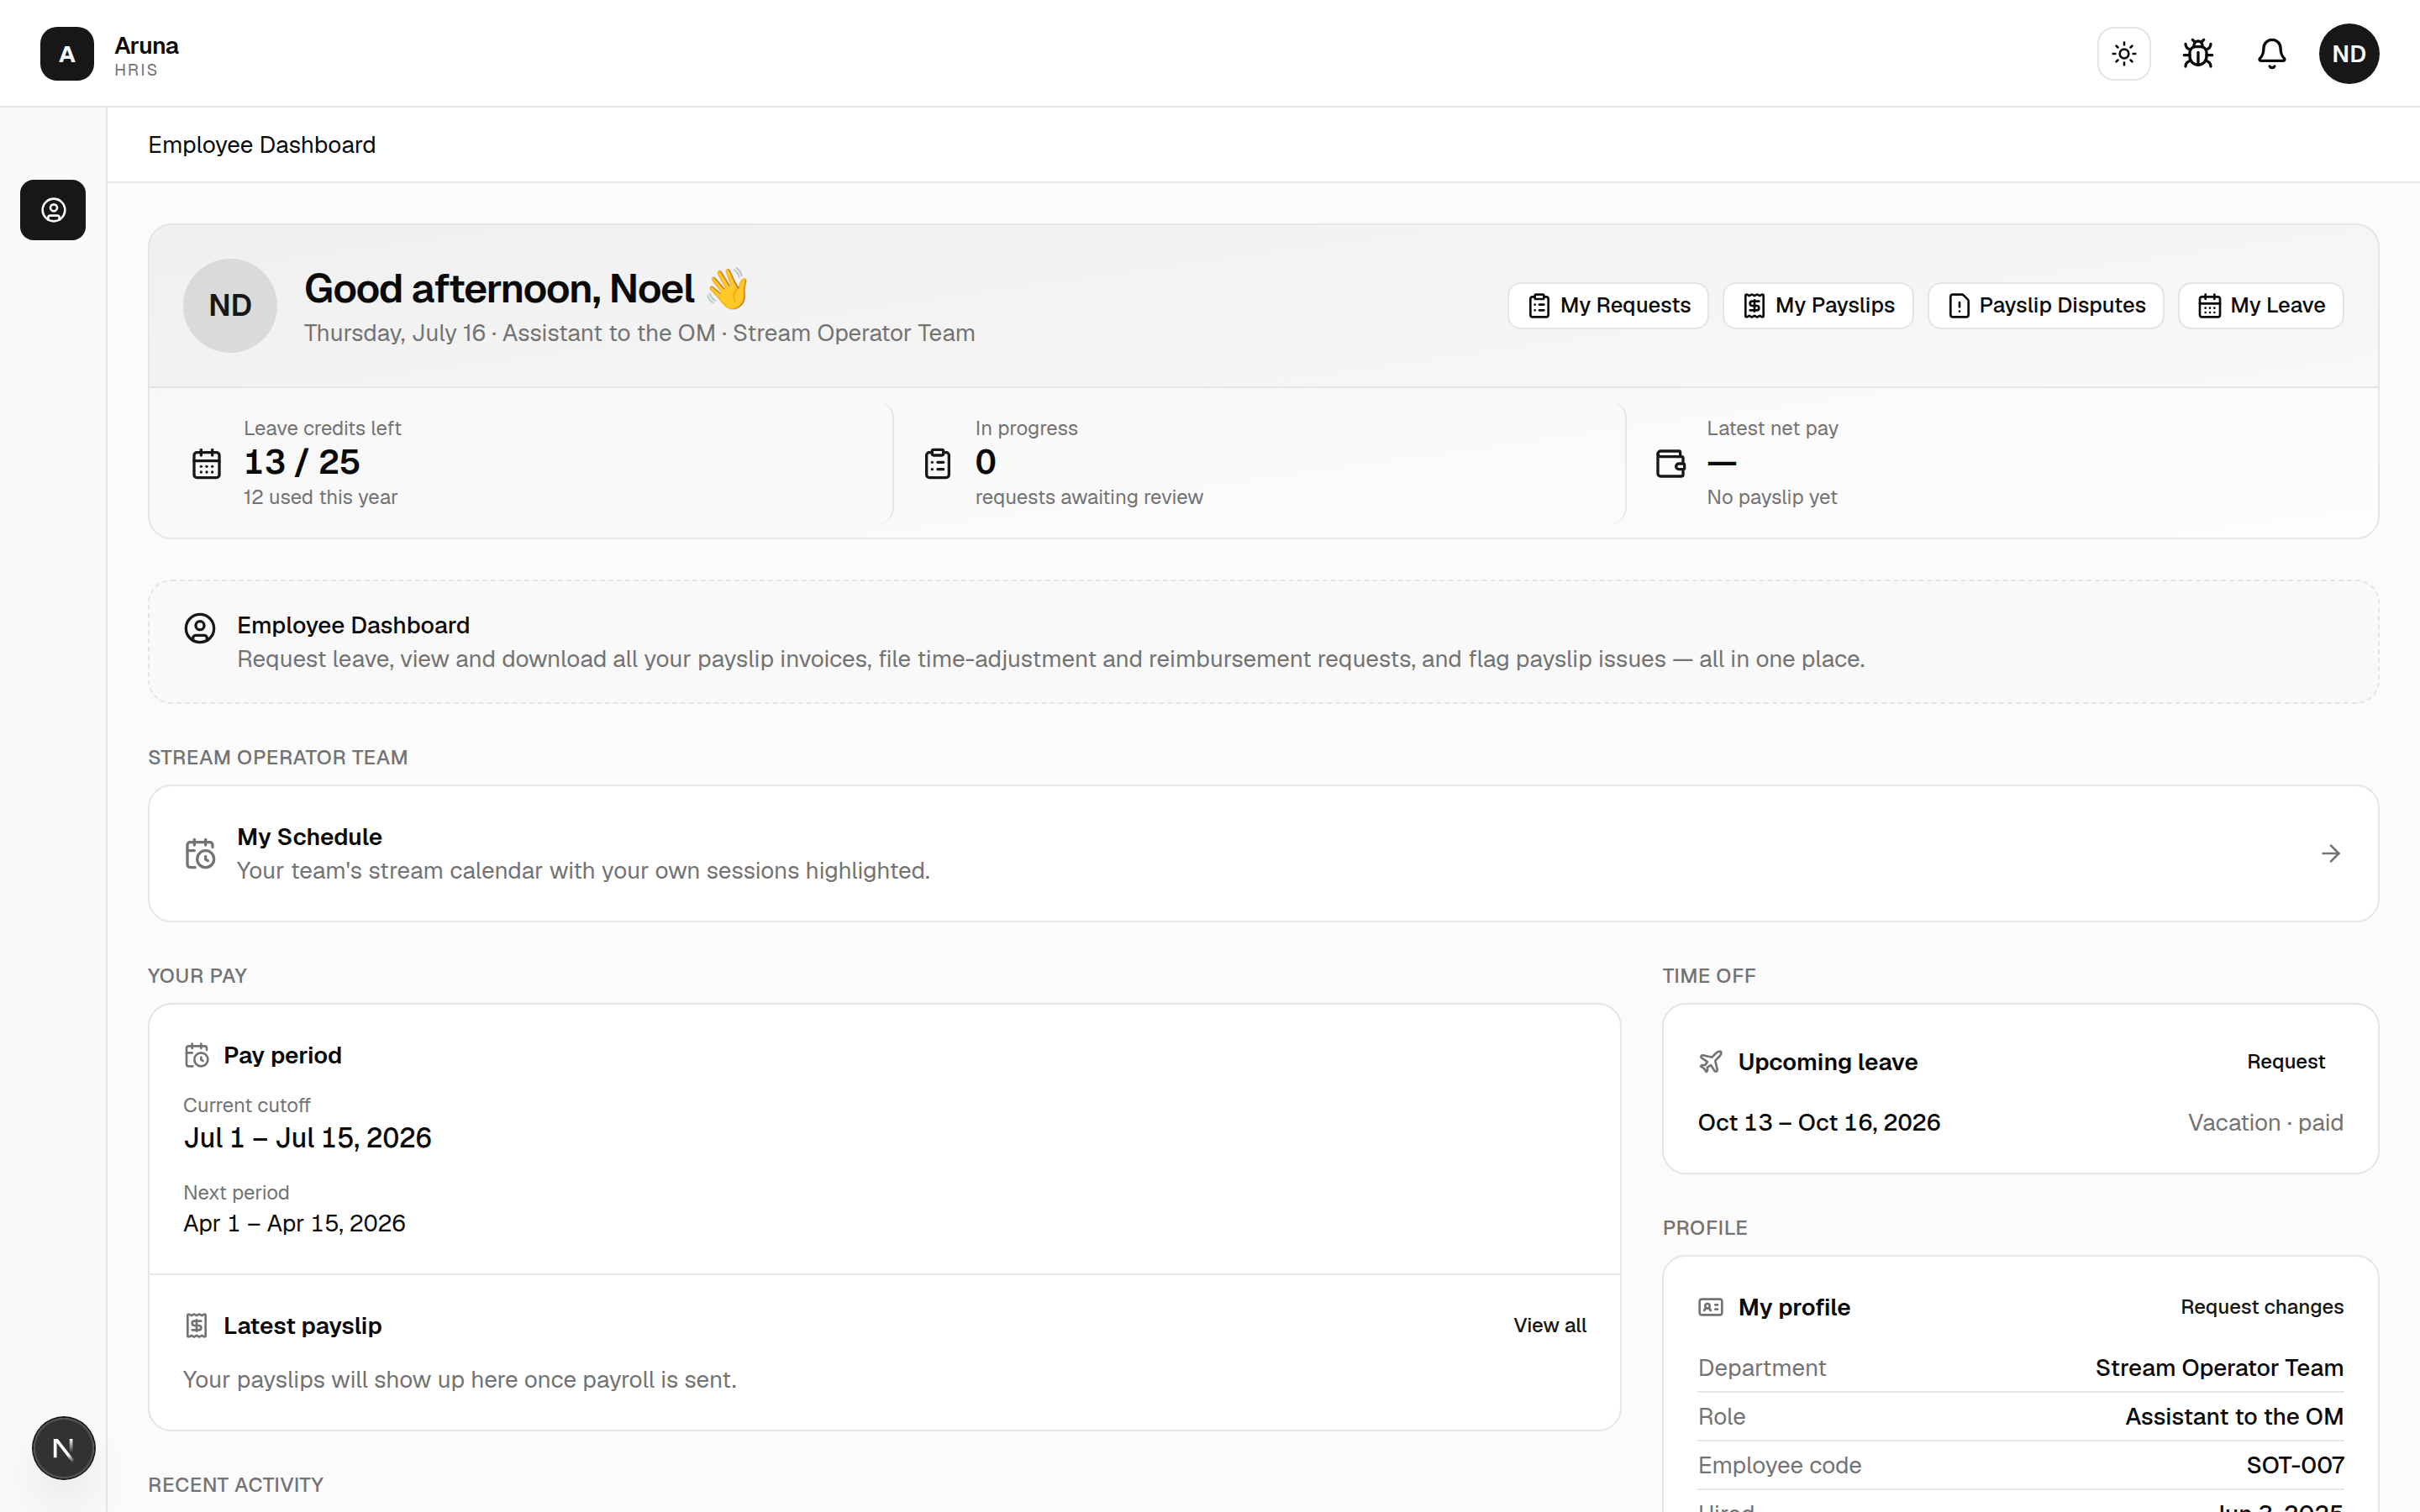
At a glance:
- Quick actions (top right): My Requests, My Payslips, Payslip Disputes, My Leave.
- Stat cards: Leave credits left, requests in progress, and your latest net pay.
- Your Pay: the current cutoff period and your latest payslip.
- Time Off: your next upcoming approved leave.
- Announcements: posts from your managers / P&C and automatic birthday & anniversary greetings (see below).
- Documents: your 3 most recent documents from P&C, with a View all documents link to the full list (see §9).
- Profile: your department, role, employee code, and hire date. Use Request changes to ask P&C to update a profile detail.
2. Announcements¶
Your team's announcements sit at the top of your dashboard, in an accent-framed panel. These are posts from your managers or People & Culture — kudos, reminders, team-wide notices — plus automatic birthday and work anniversary greetings.
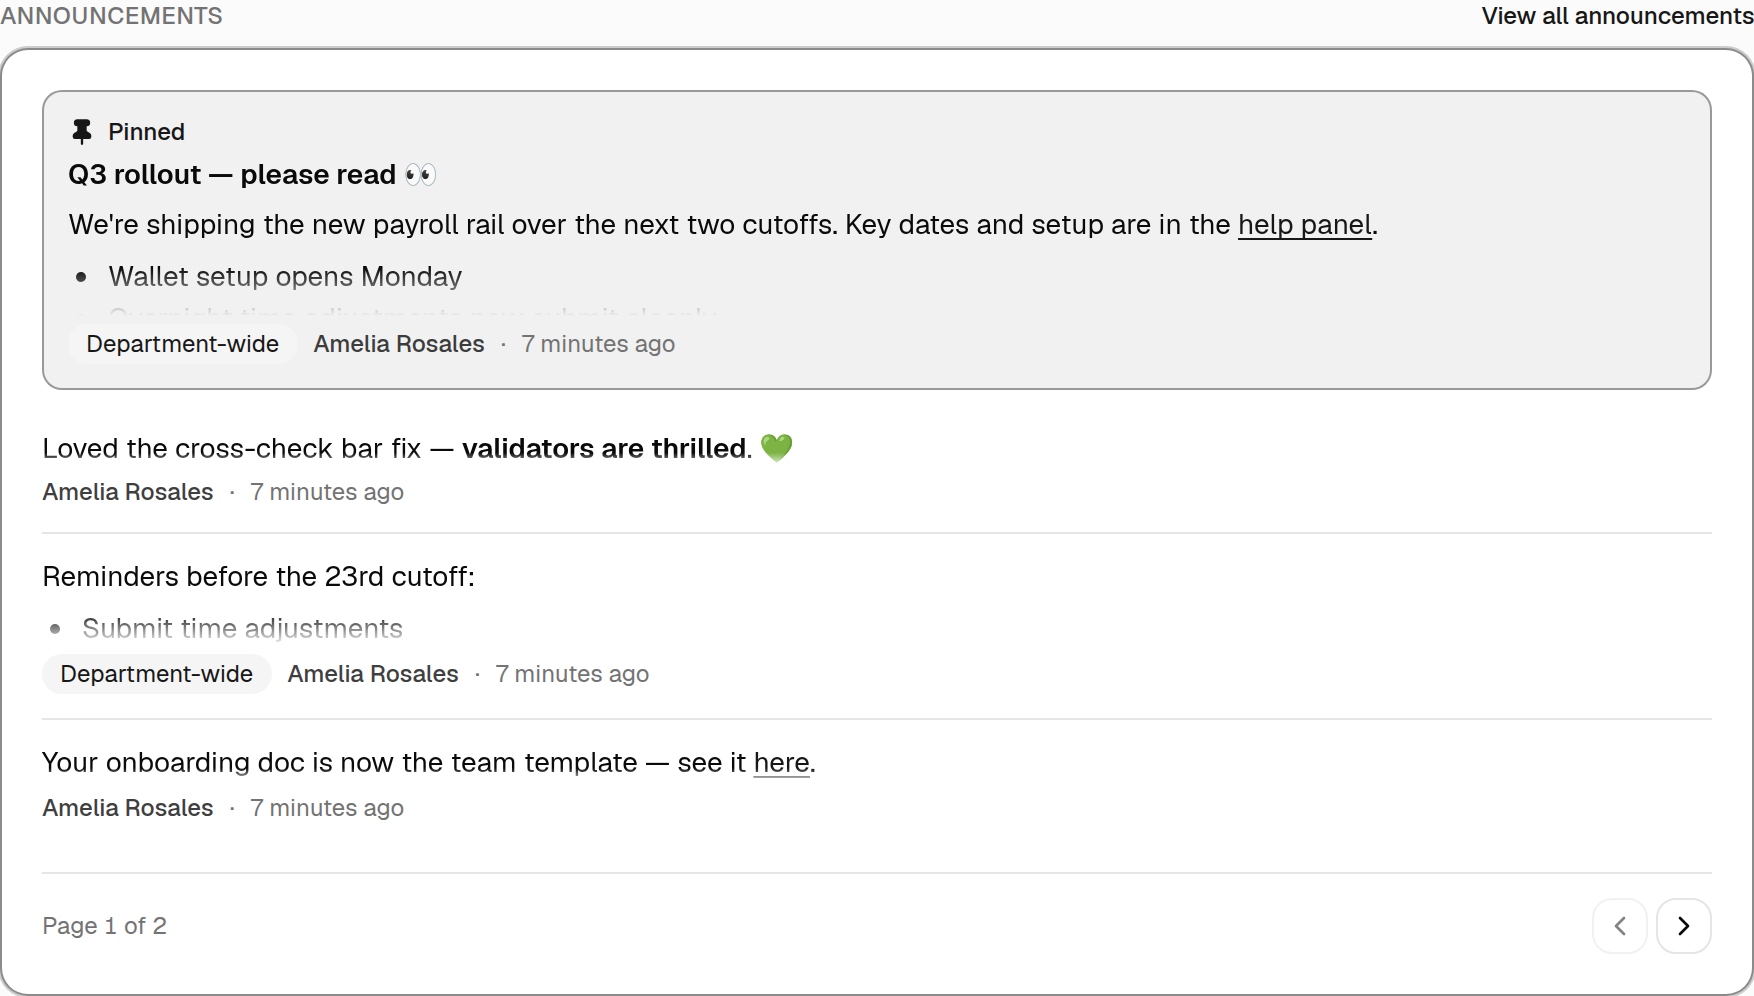
- A pinned announcement (📌) always sits at the very top, above the rest, and stays there while you page through the others.
- Each entry shows a short preview — click it to open the full message, which can include formatting and links.
- The panel shows 3 at a time; use the arrows to page through more, or View all announcements (top right) for the complete history.
- You also get an email whenever a new announcement is addressed to you or your team (including your birthday / anniversary).
3. Edit your profile & password¶
Open Profile (from the profile menu / Settings).
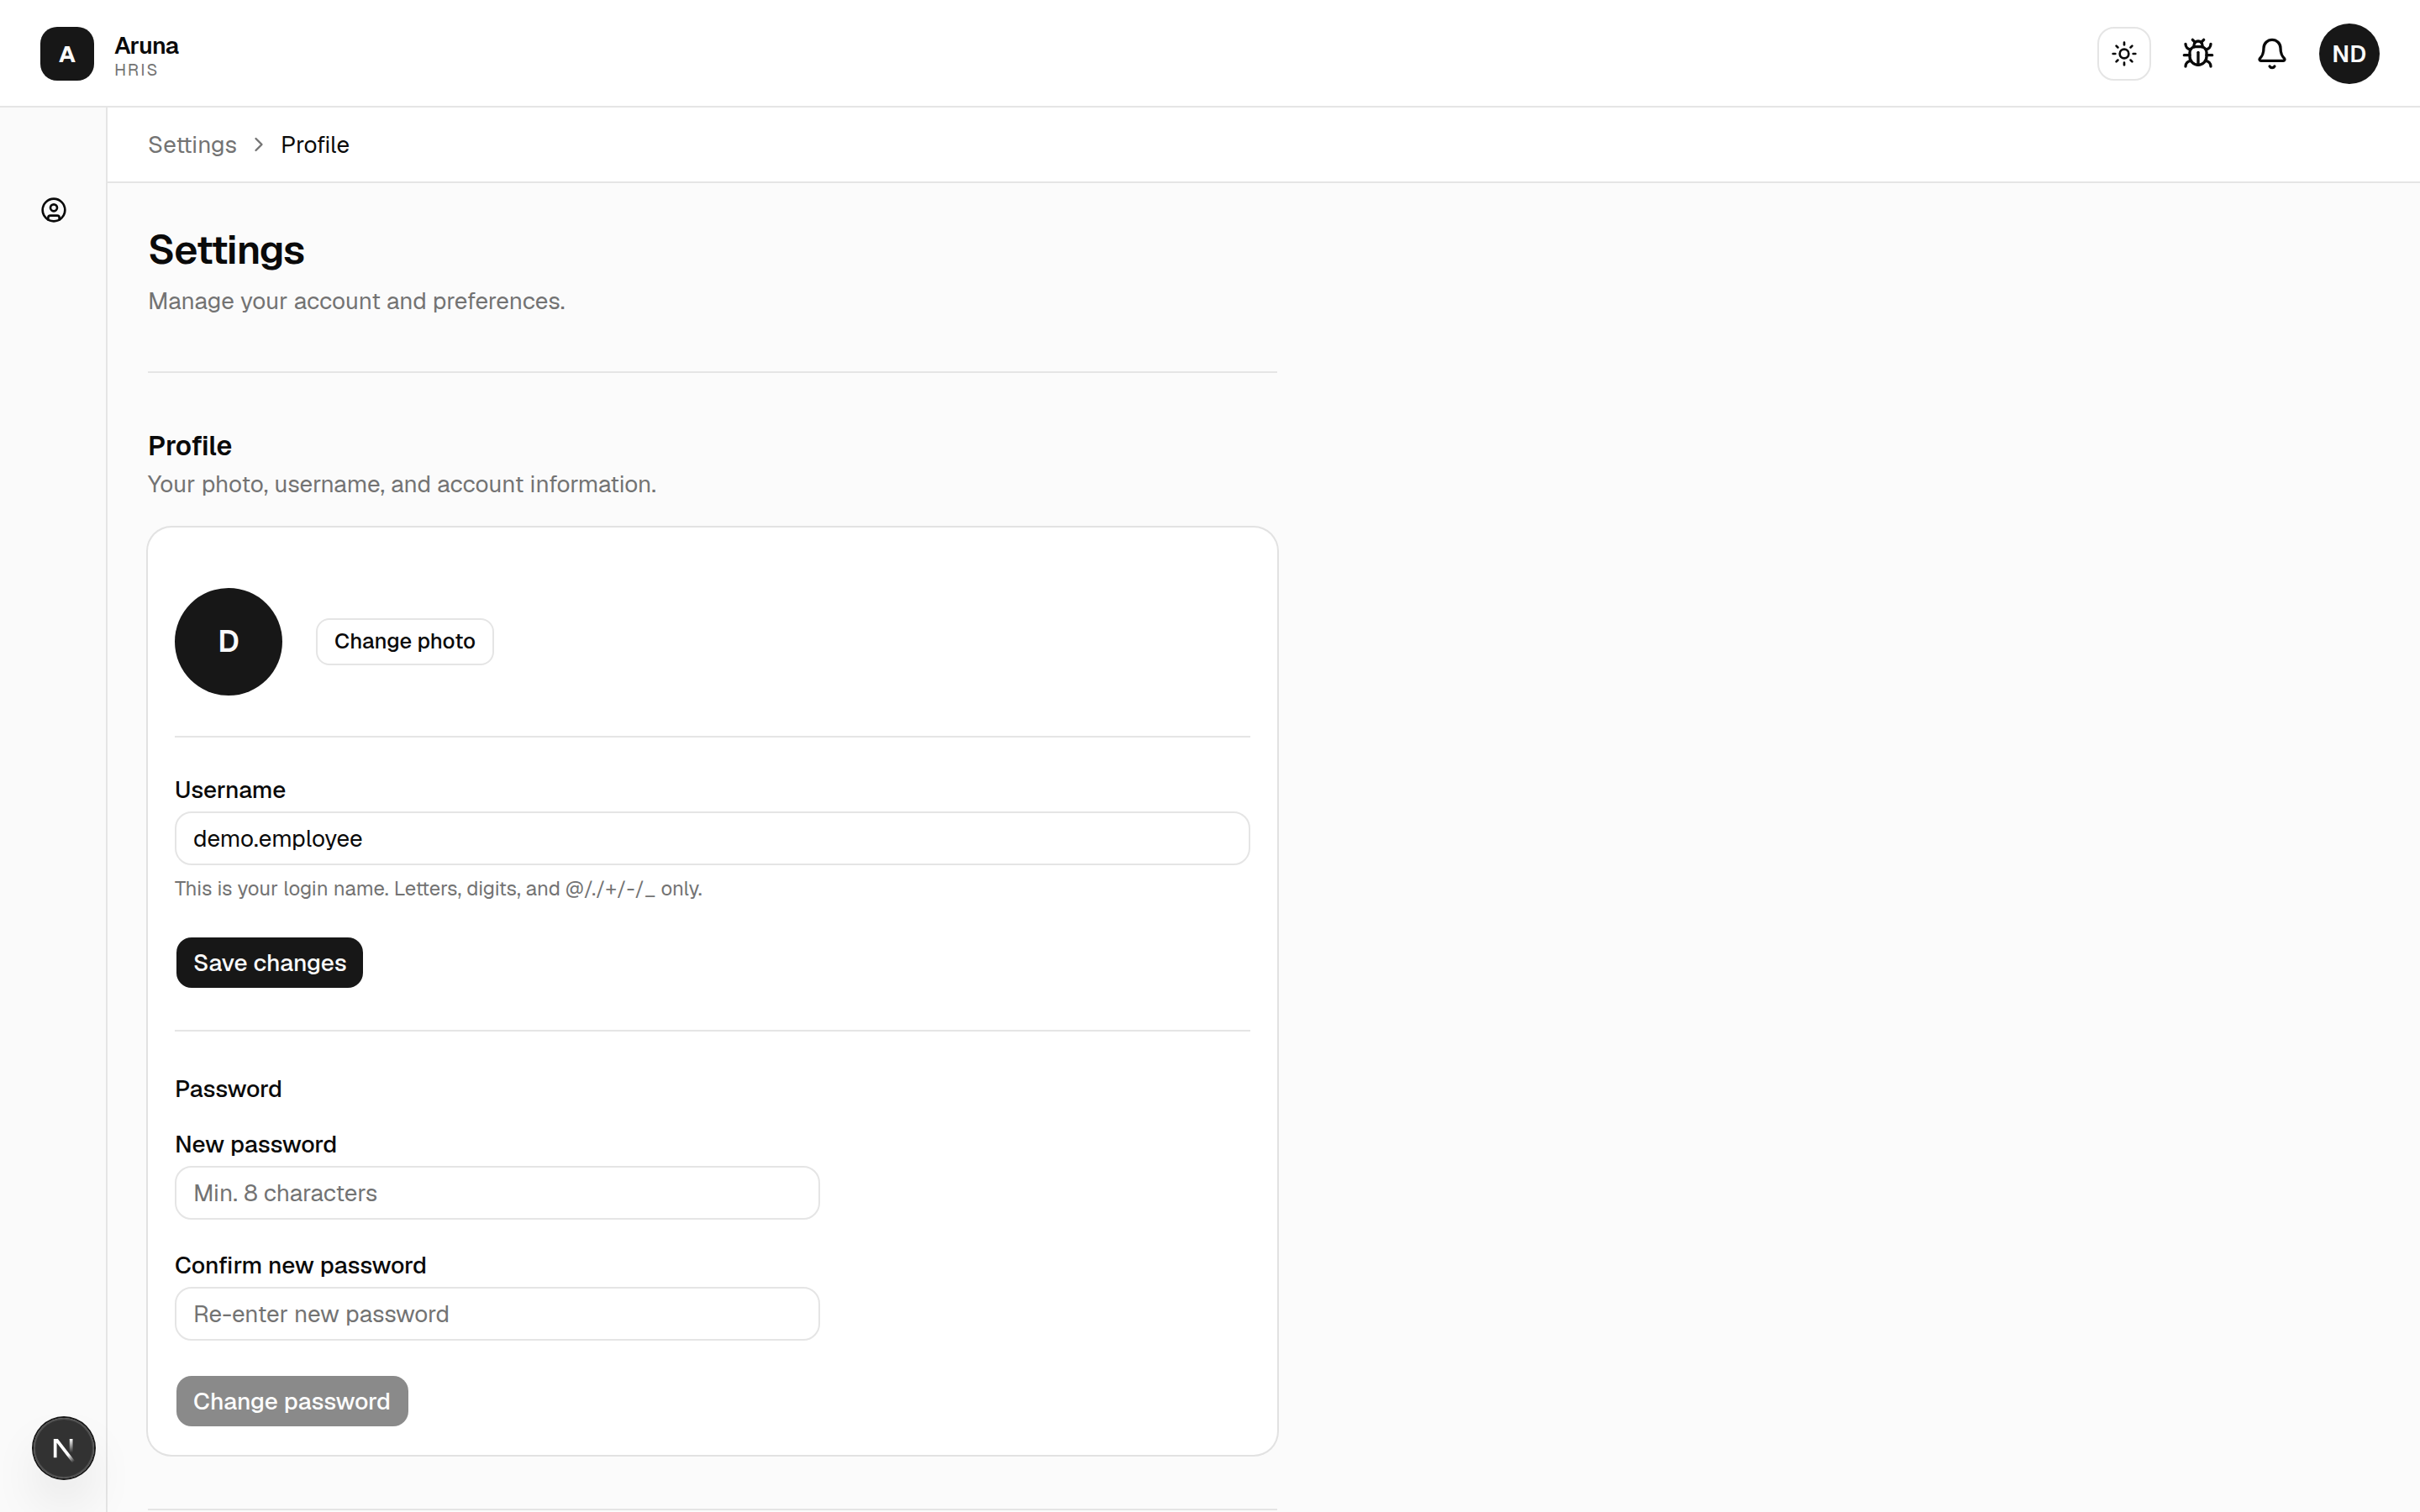
- Change photo and Username update immediately with Save changes.
- Password: enter a new password (min. 8 characters), confirm it, then Change password.
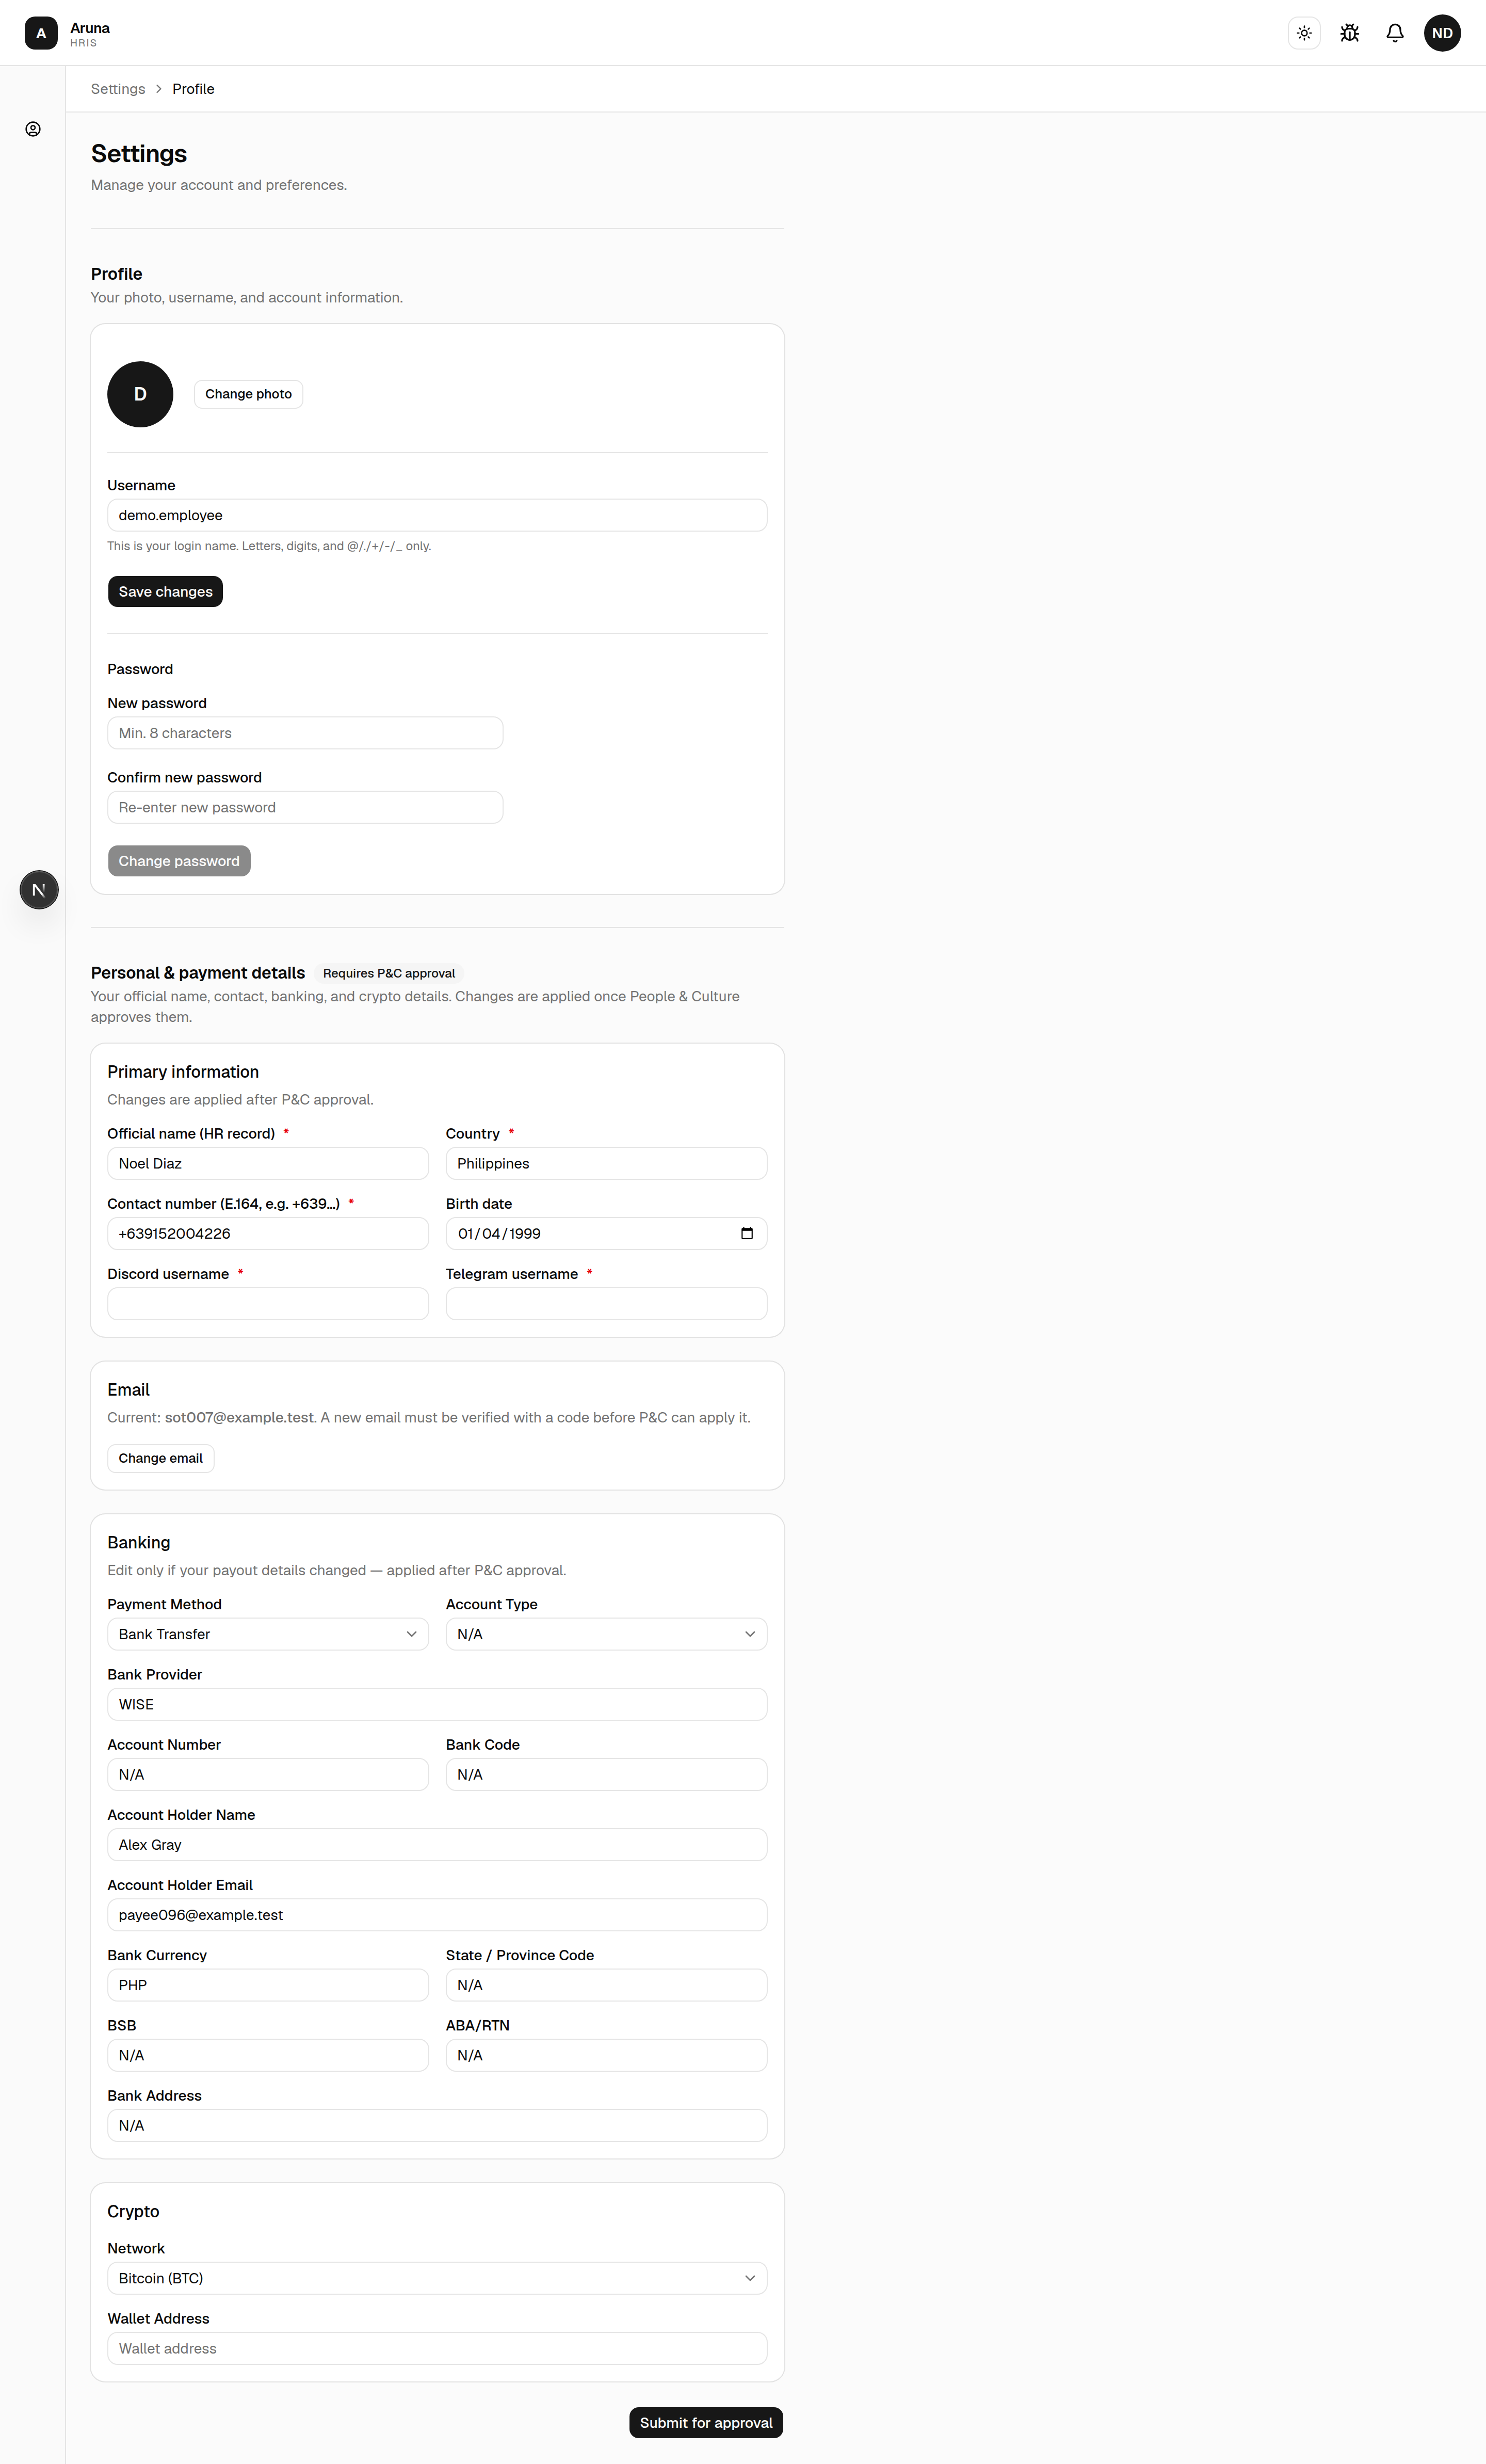
- Other details (name, contact, banking, crypto) are further down the same page under Personal & payment details — these require P&C approval. Edit them and click Submit for approval; the change applies once P&C approves.
Both payment blocks are optional. If you have details on file and want them gone, Request removal on that block — the fields are replaced by a notice you can Undo any time before submitting, and P&C deletes the details when they approve. Leave the regional bank fields (state / province, ABA / RTN, BSB, bank address) blank if they don't apply to your account.
4. Submit a time-adjustment request¶
Use this when Time Doctor missed hours you actually worked.
- Go to My Requests → New → Time Adjustment (or the Requests page).
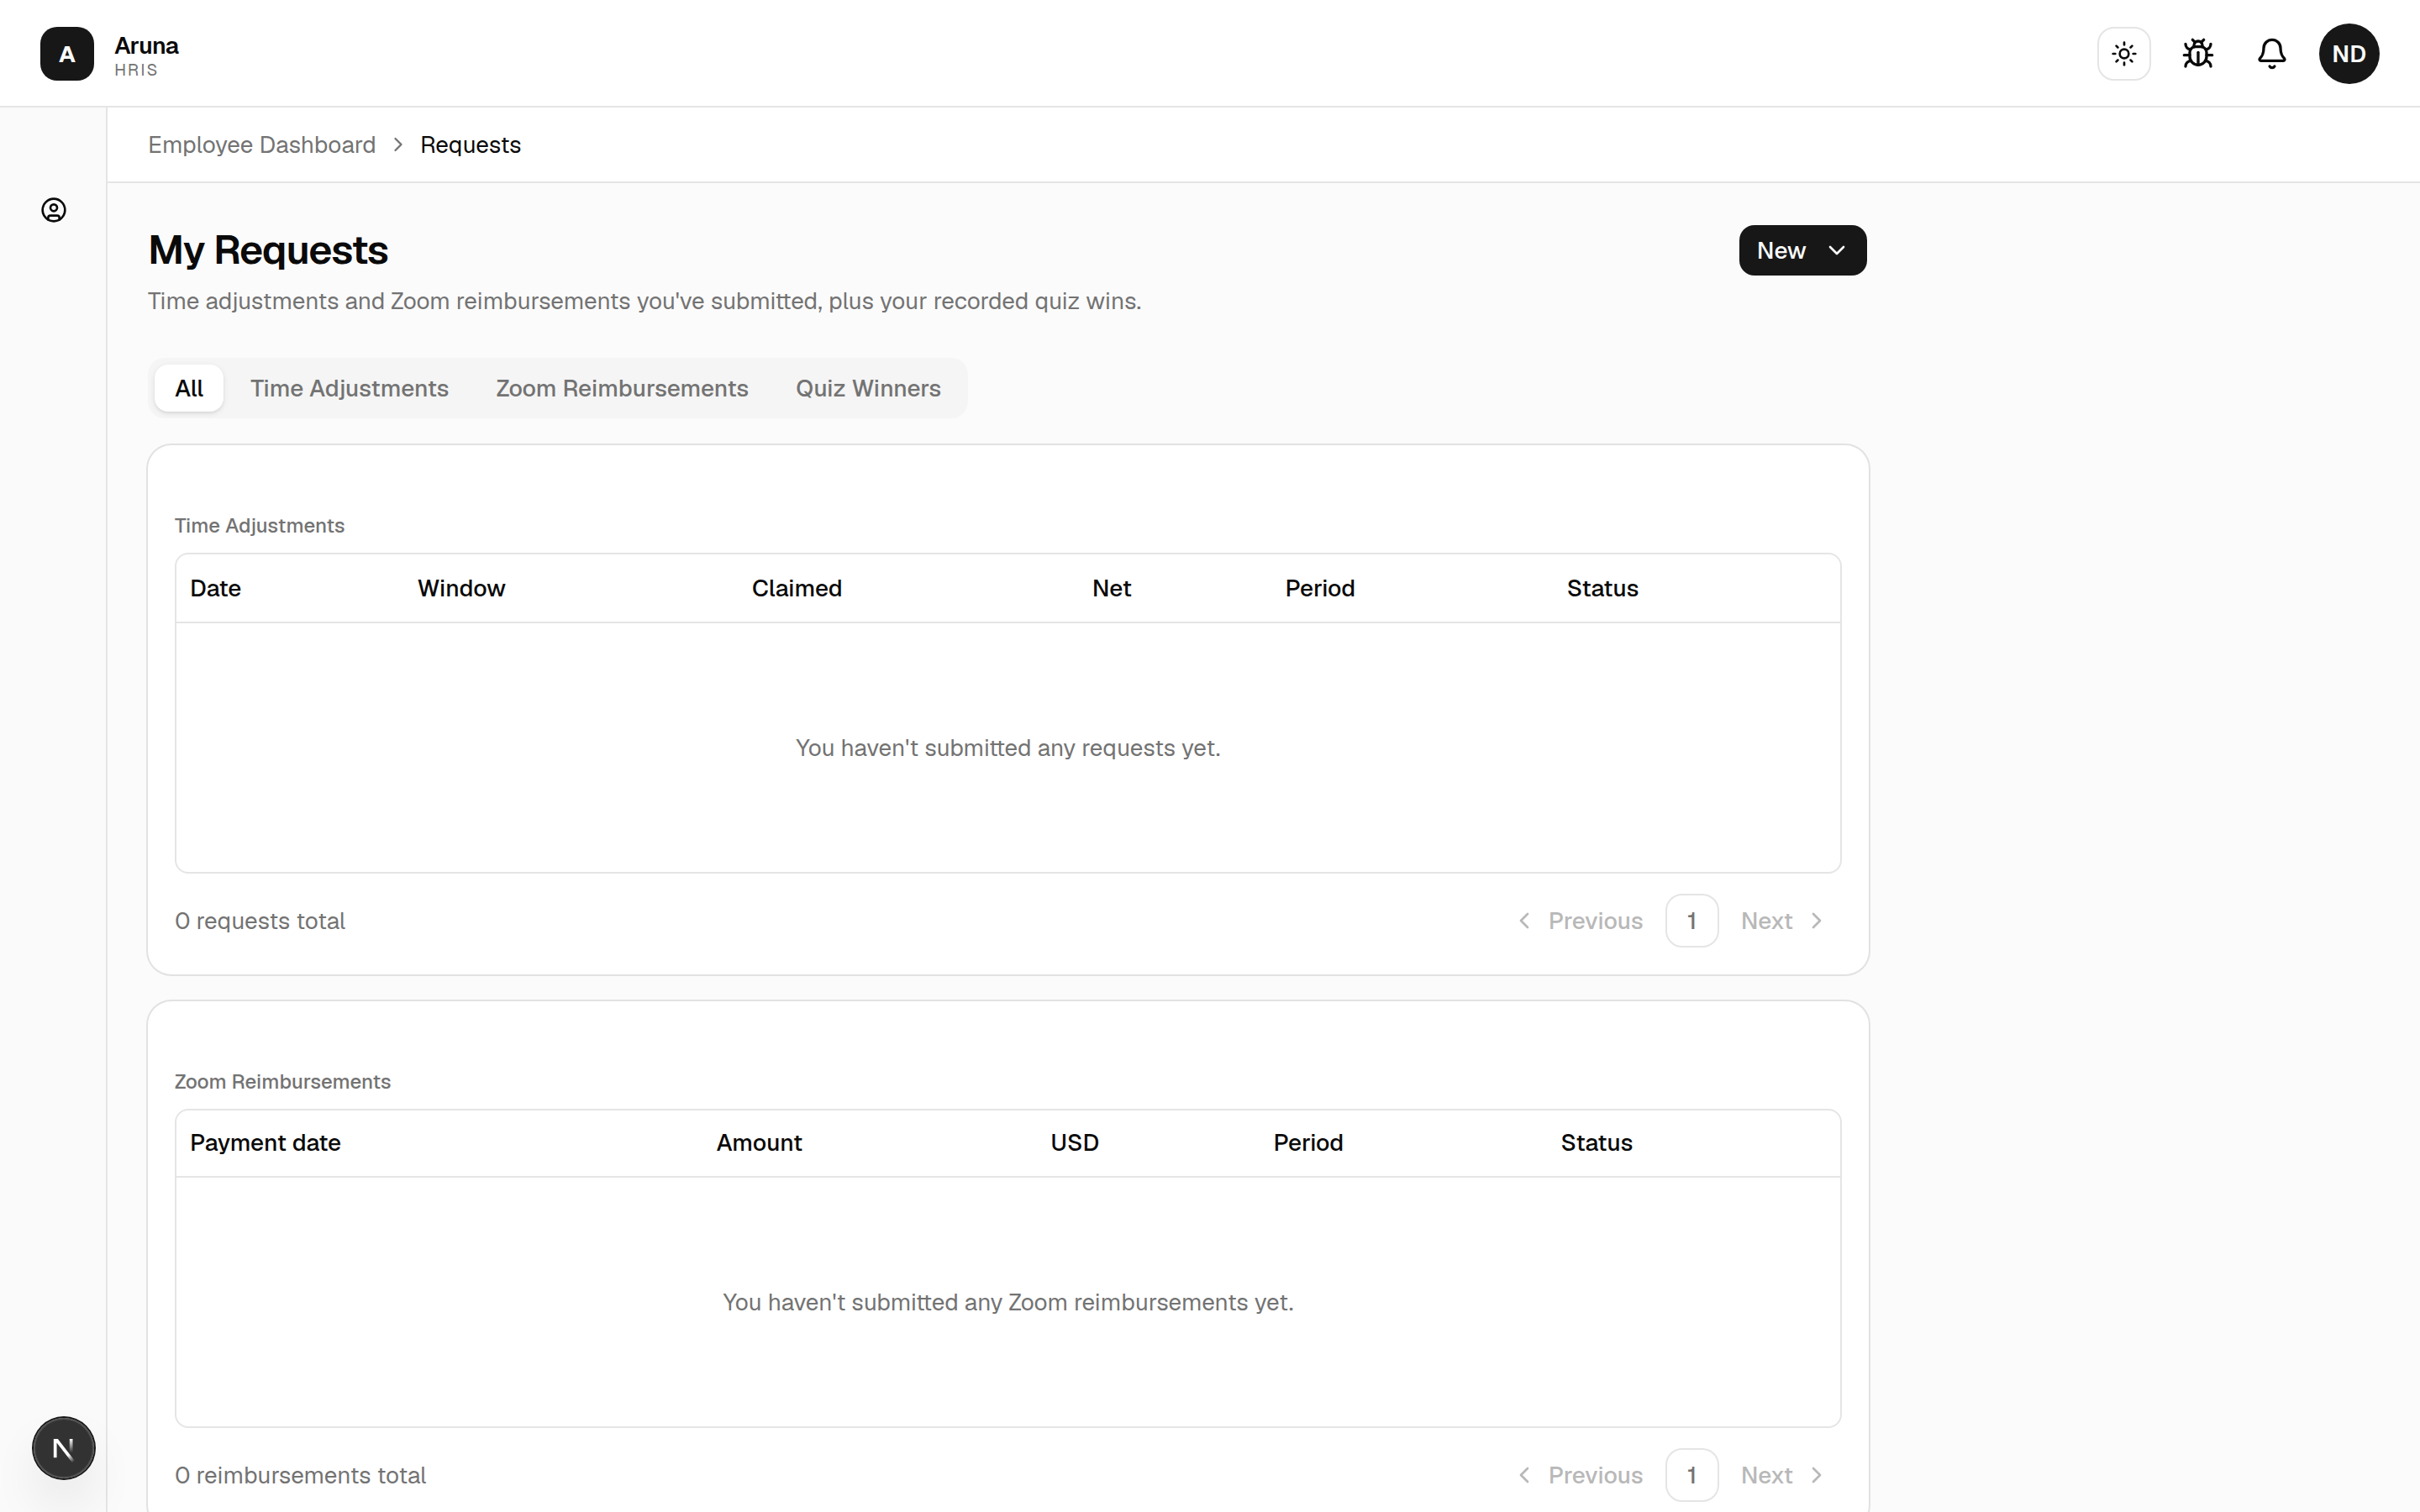
The New button opens a menu: Time Adjustment, Zoom Reimbursement, or Additional Reimbursement.
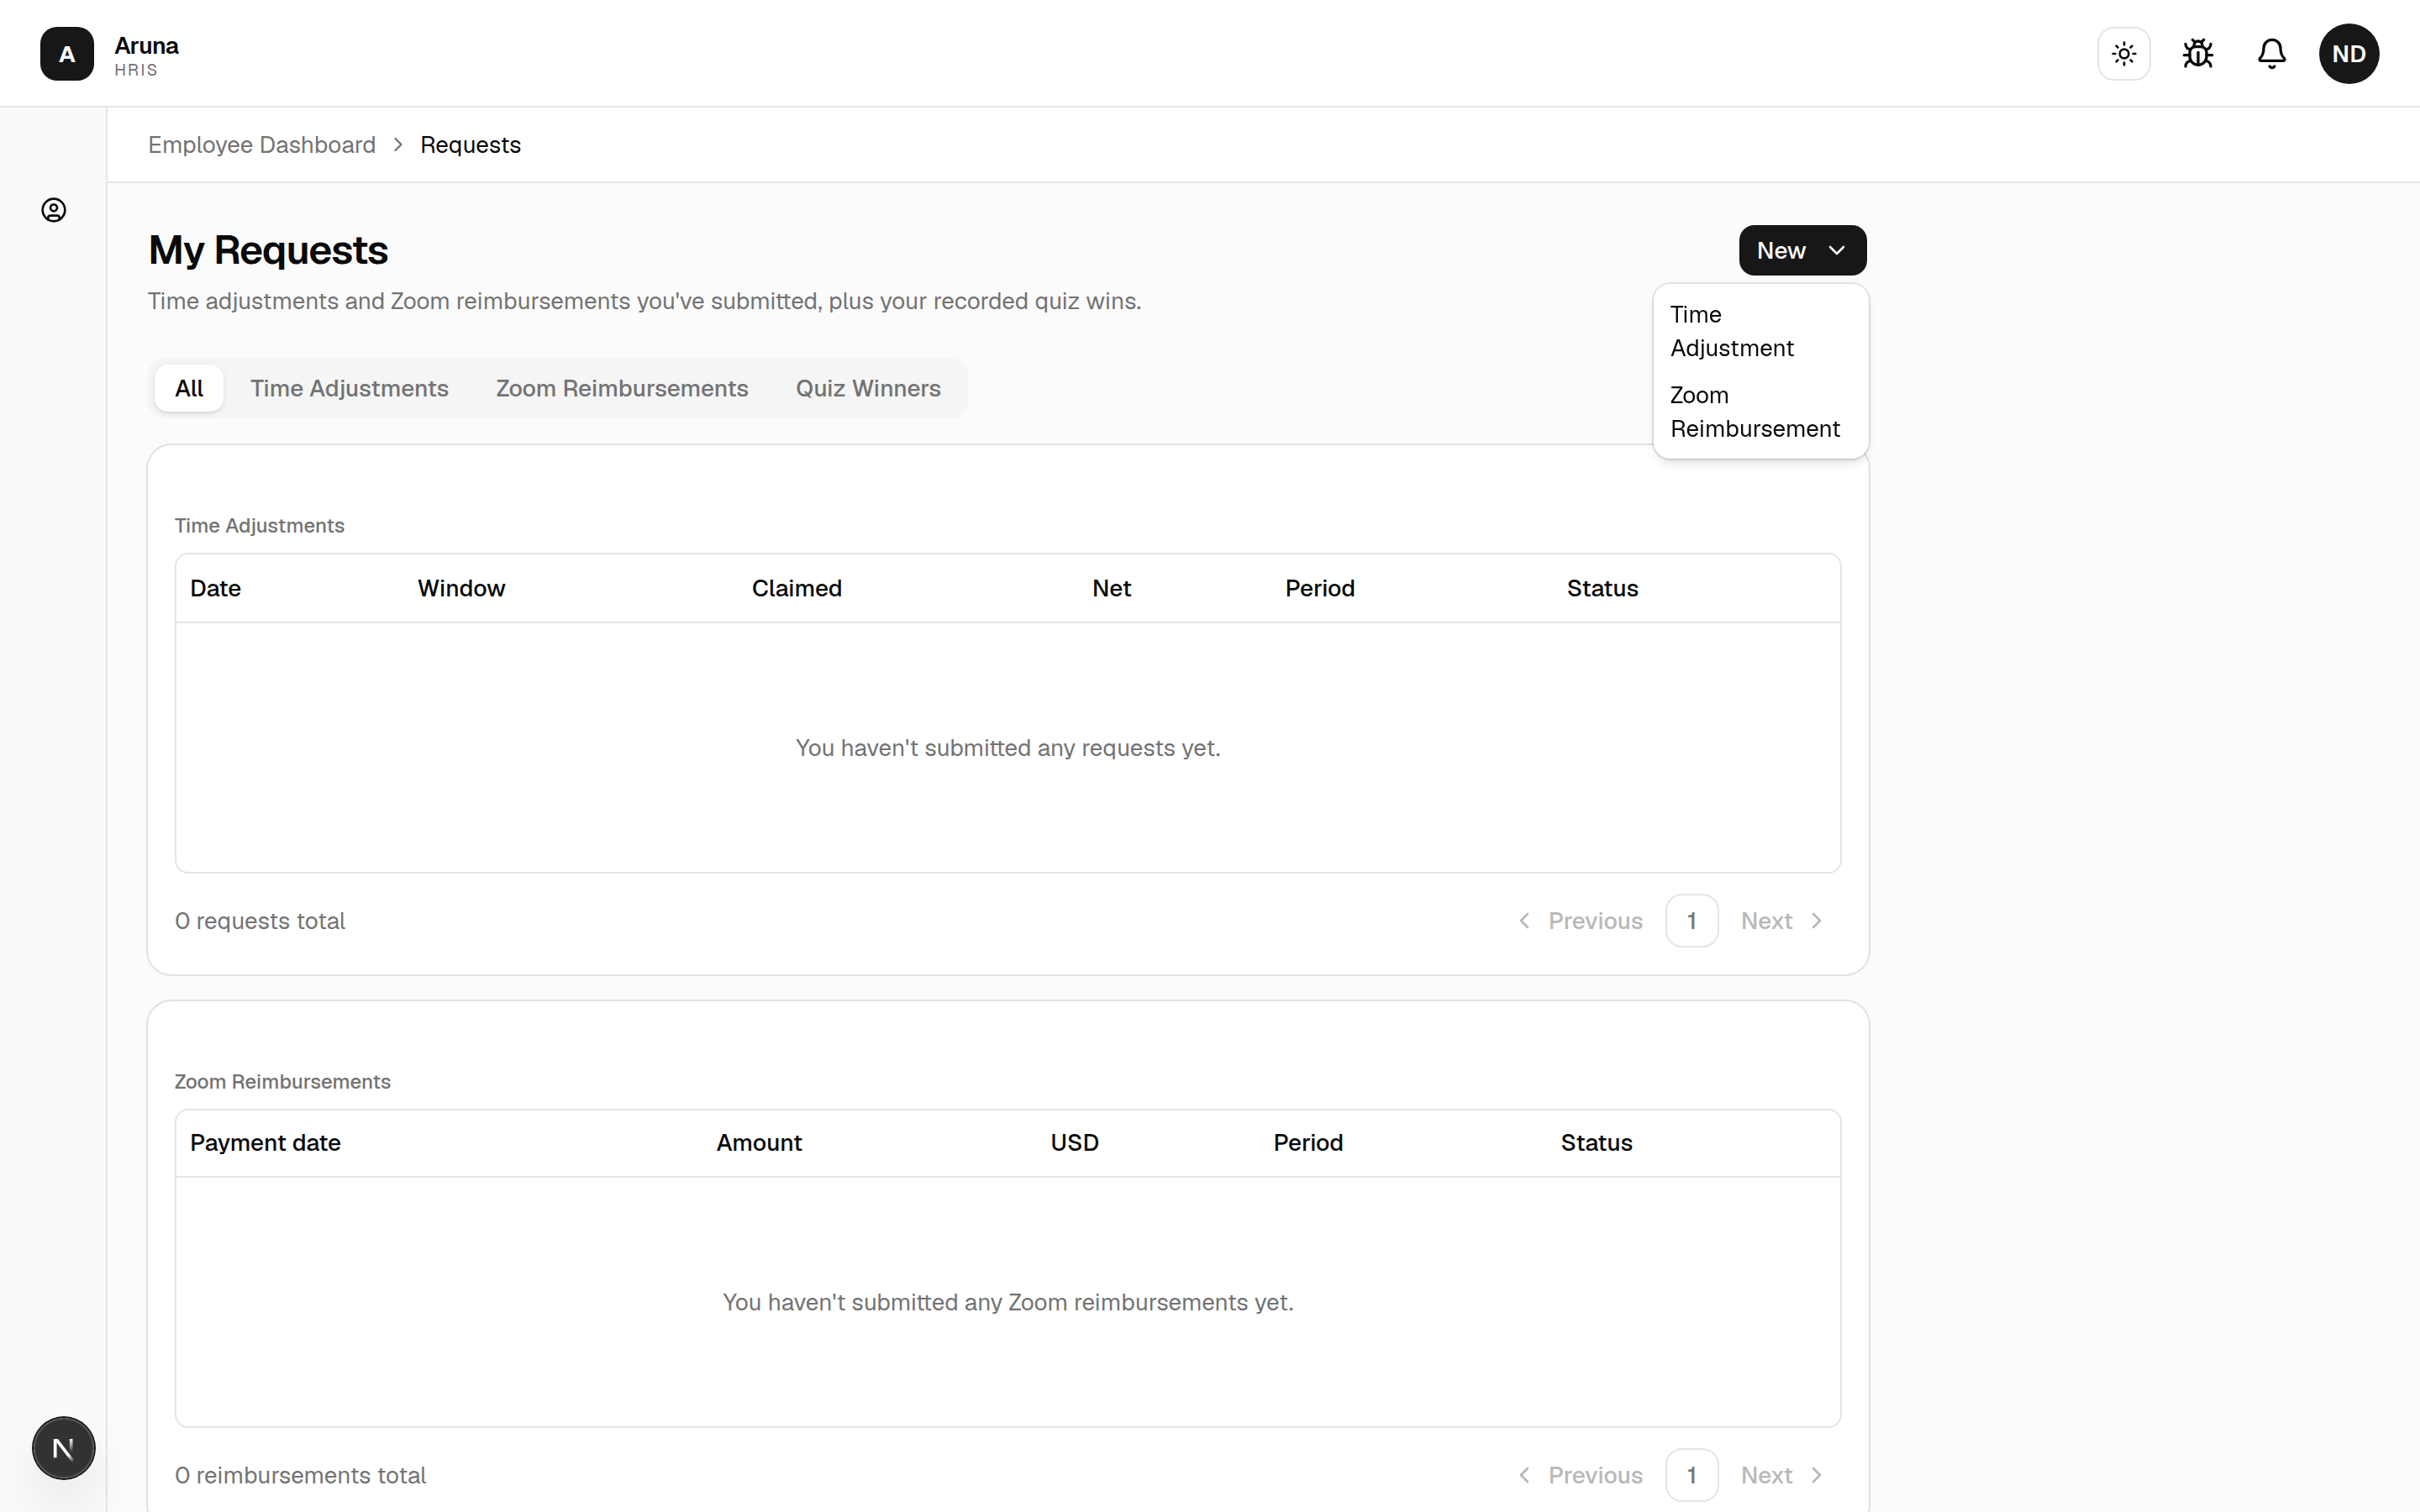
- Fill in the date, your timezone, the start/end time of the unrecorded window, and a reason. Optionally attach up to 3 proof images (1 MB each).
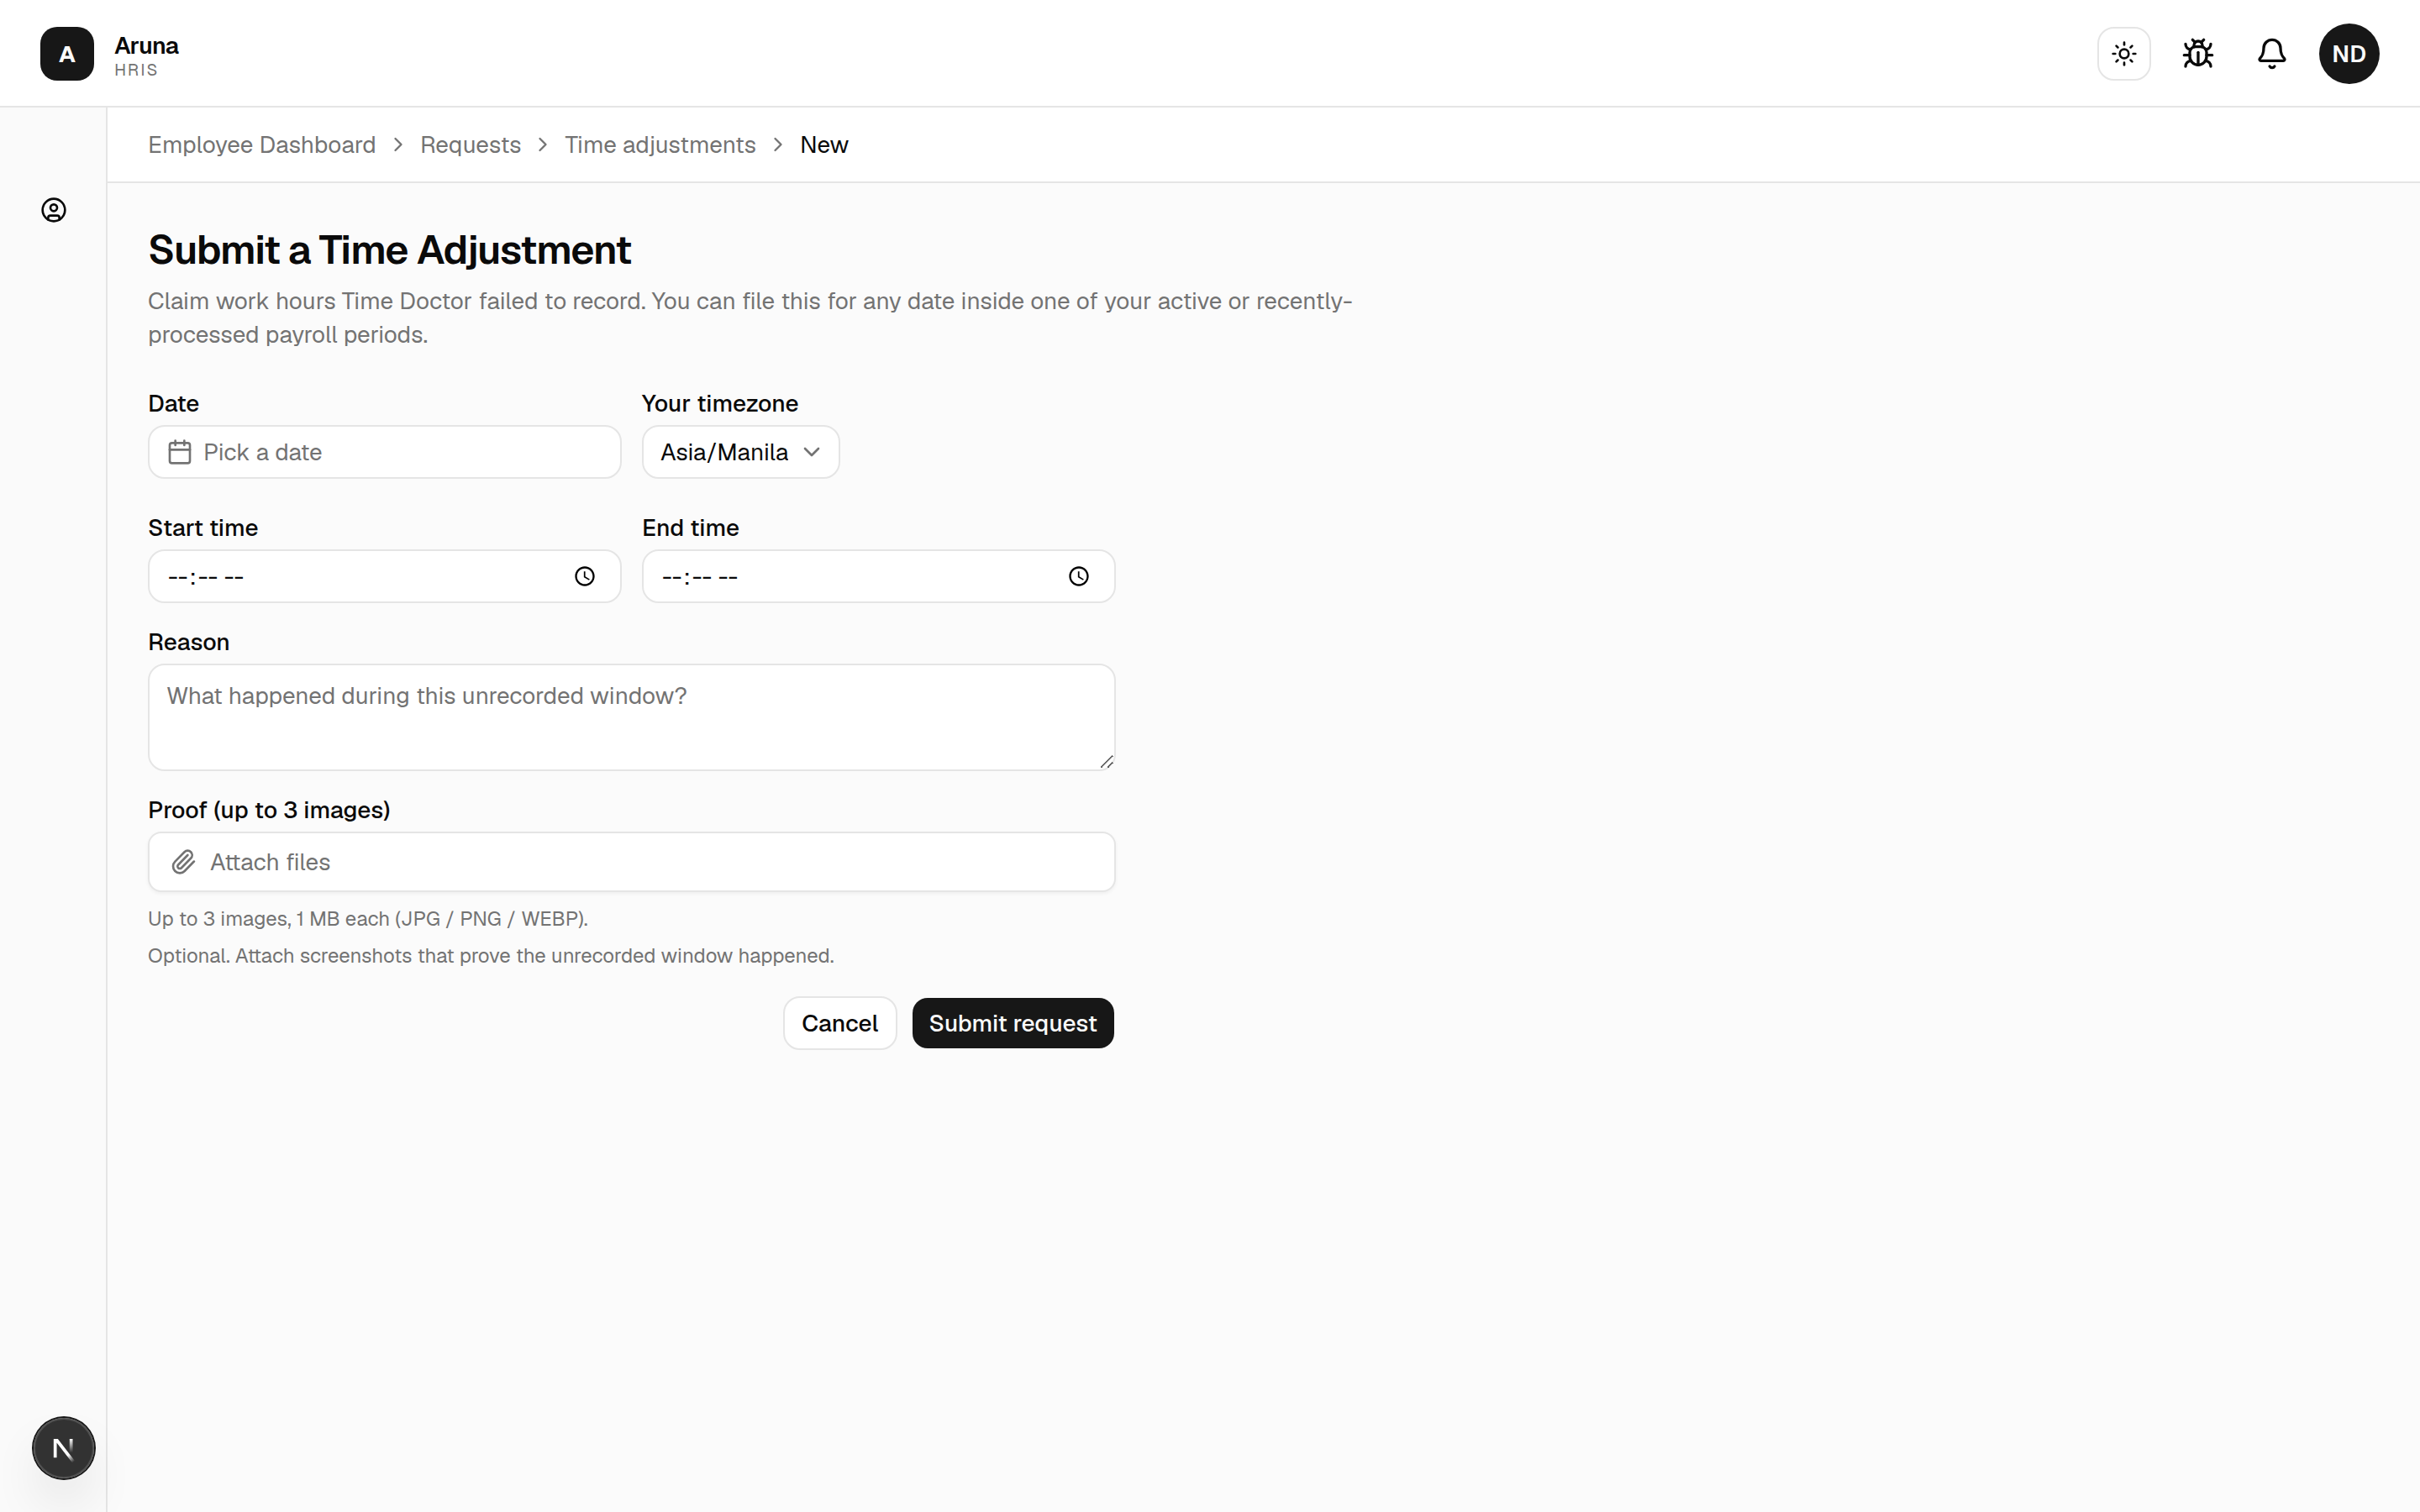
- Submit request. Your department manager reviews it; approved hours flow into that period's payroll.
You can only file for a date inside an active or recently-processed payroll period.
Cancelling. A request can't be edited after you submit it — but while it's still pending you can open it from My Requests and click Cancel request. Once a reviewer has approved (or rejected) it, it's locked; if something's wrong, submit a new one. This applies to Time Adjustments and both kinds of reimbursement.
5. Submit a Zoom reimbursement¶
Get paid back for a Zoom invoice you covered.
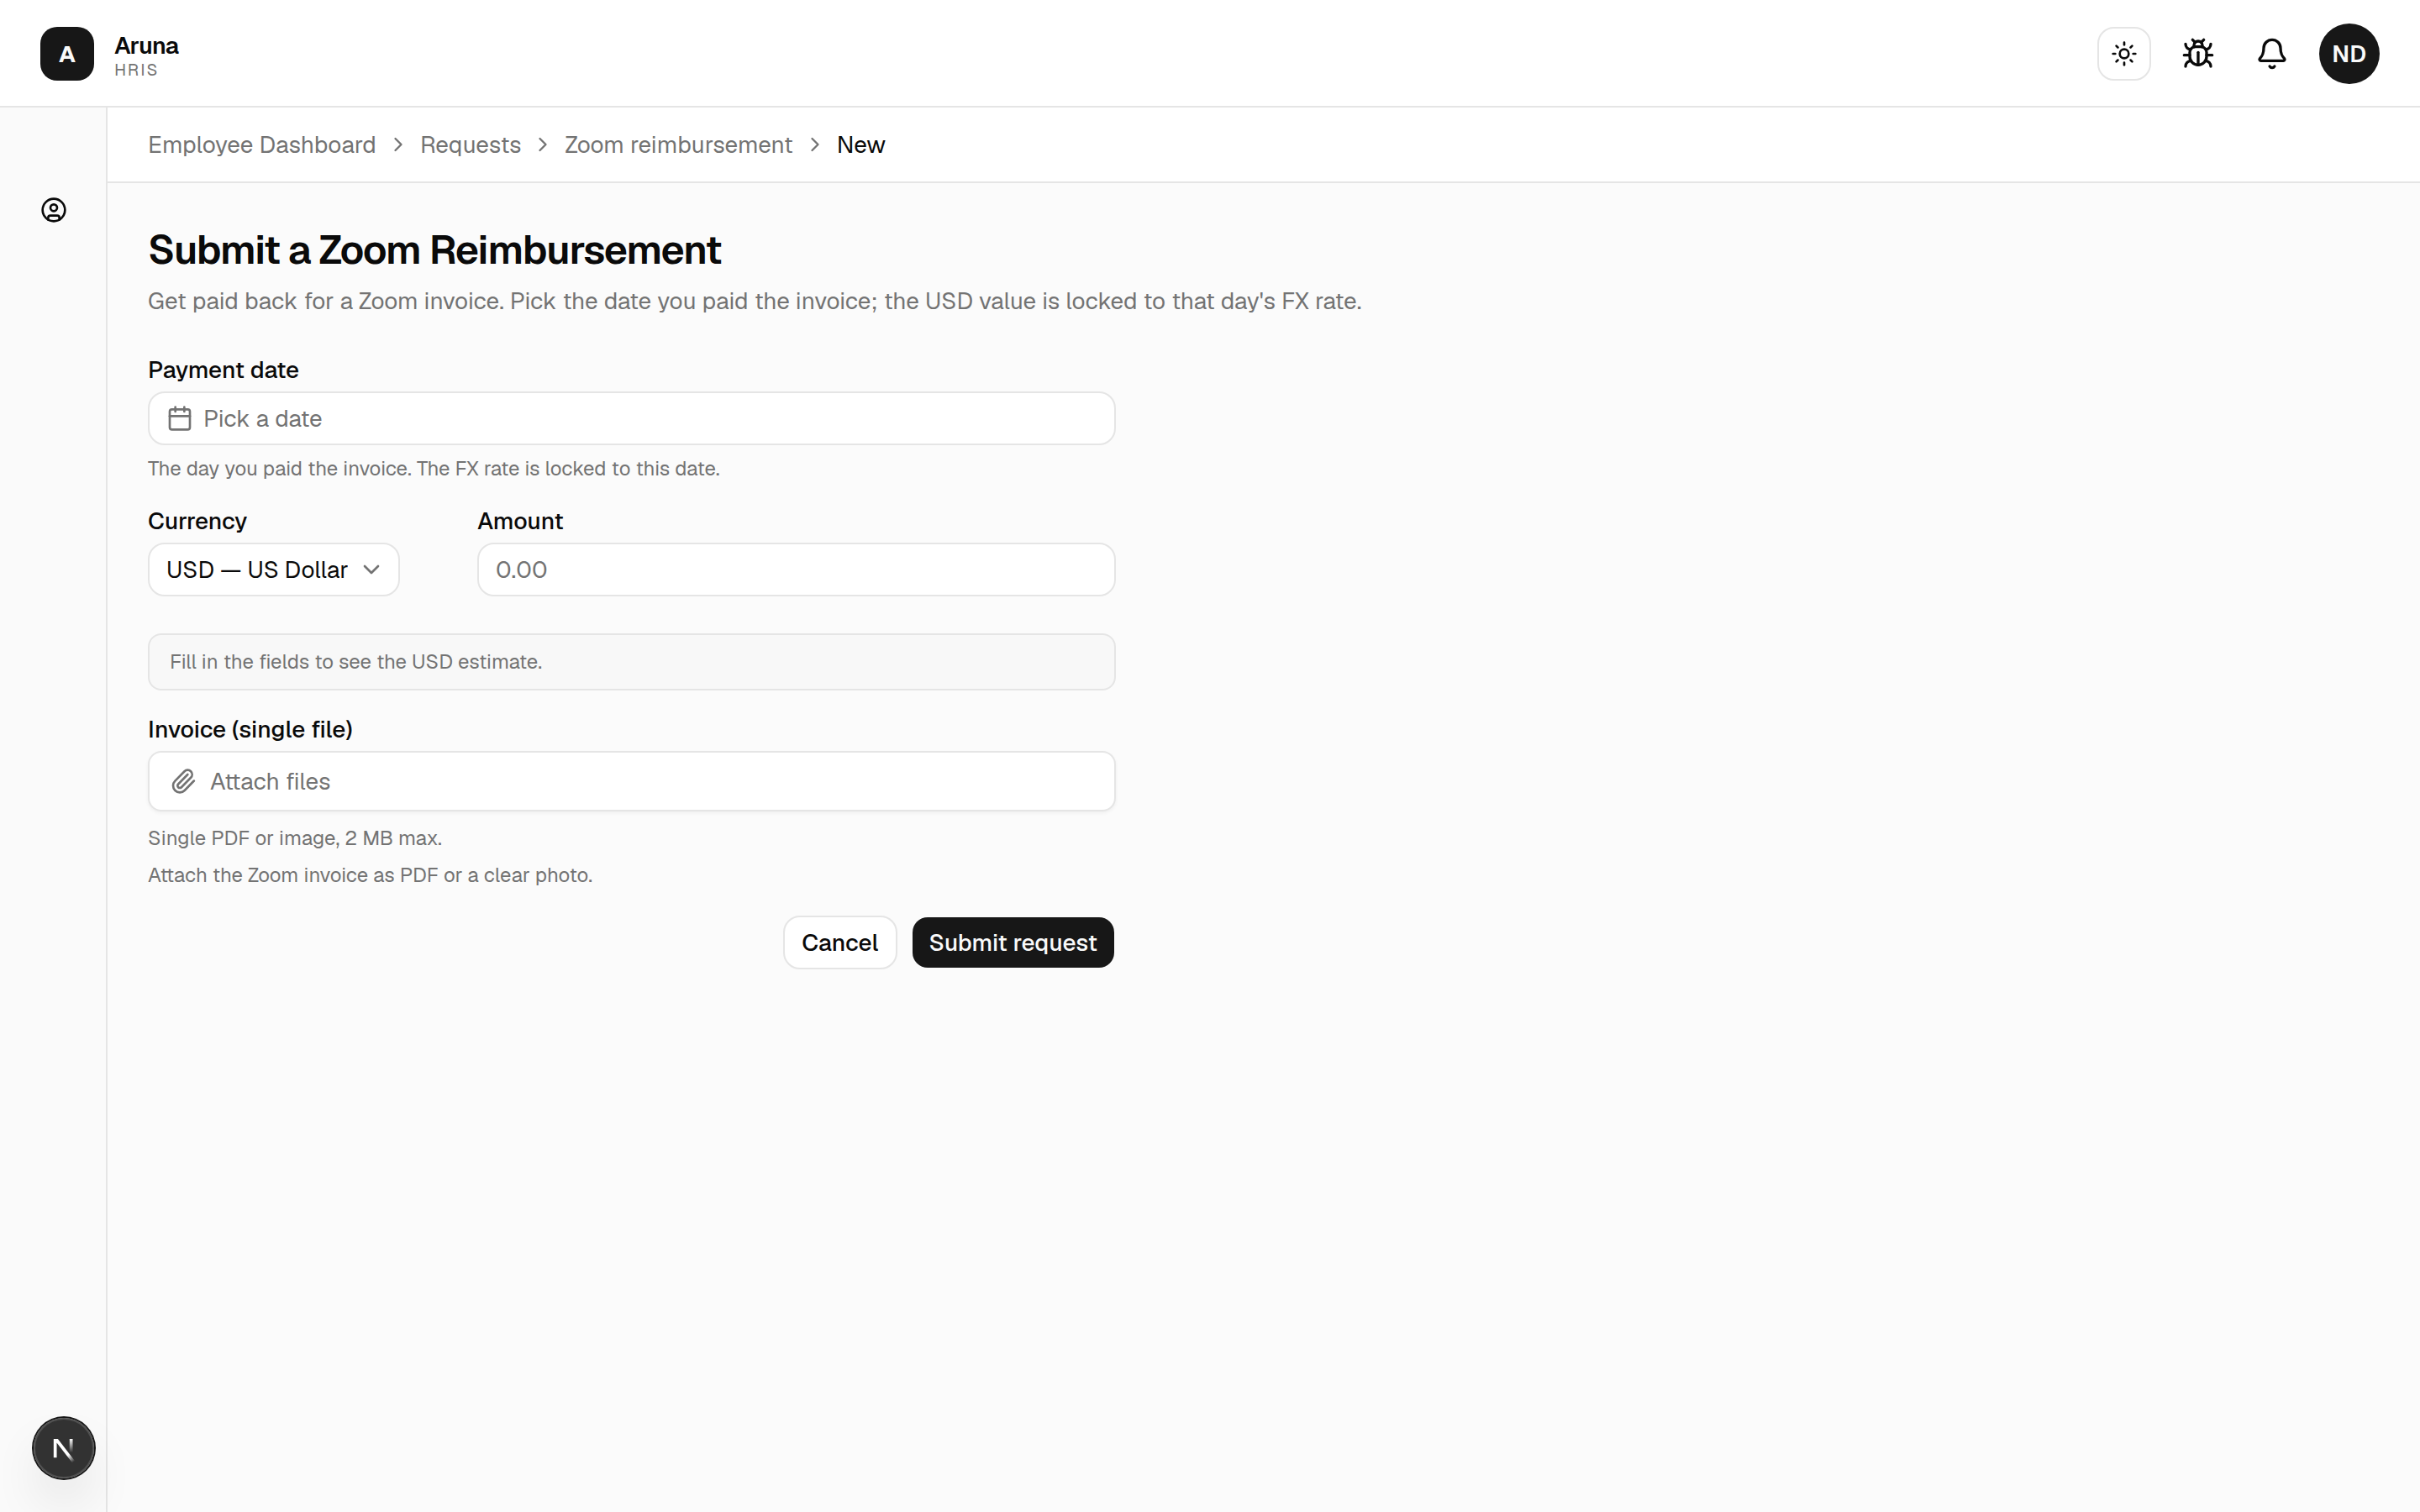
- Pick the date you paid the invoice — the USD value is locked to that day's FX rate.
- Choose the currency, enter the amount, and attach the invoice (one PDF or image, 2 MB max).
- Submit request. It routes to the right approver and, once approved, is added to your pay.
6. Claim back any other cost¶
Anything you paid for out of pocket that isn't a Zoom invoice — a client dinner, fan-account tokens, a software licence — goes through Additional Reimbursement.
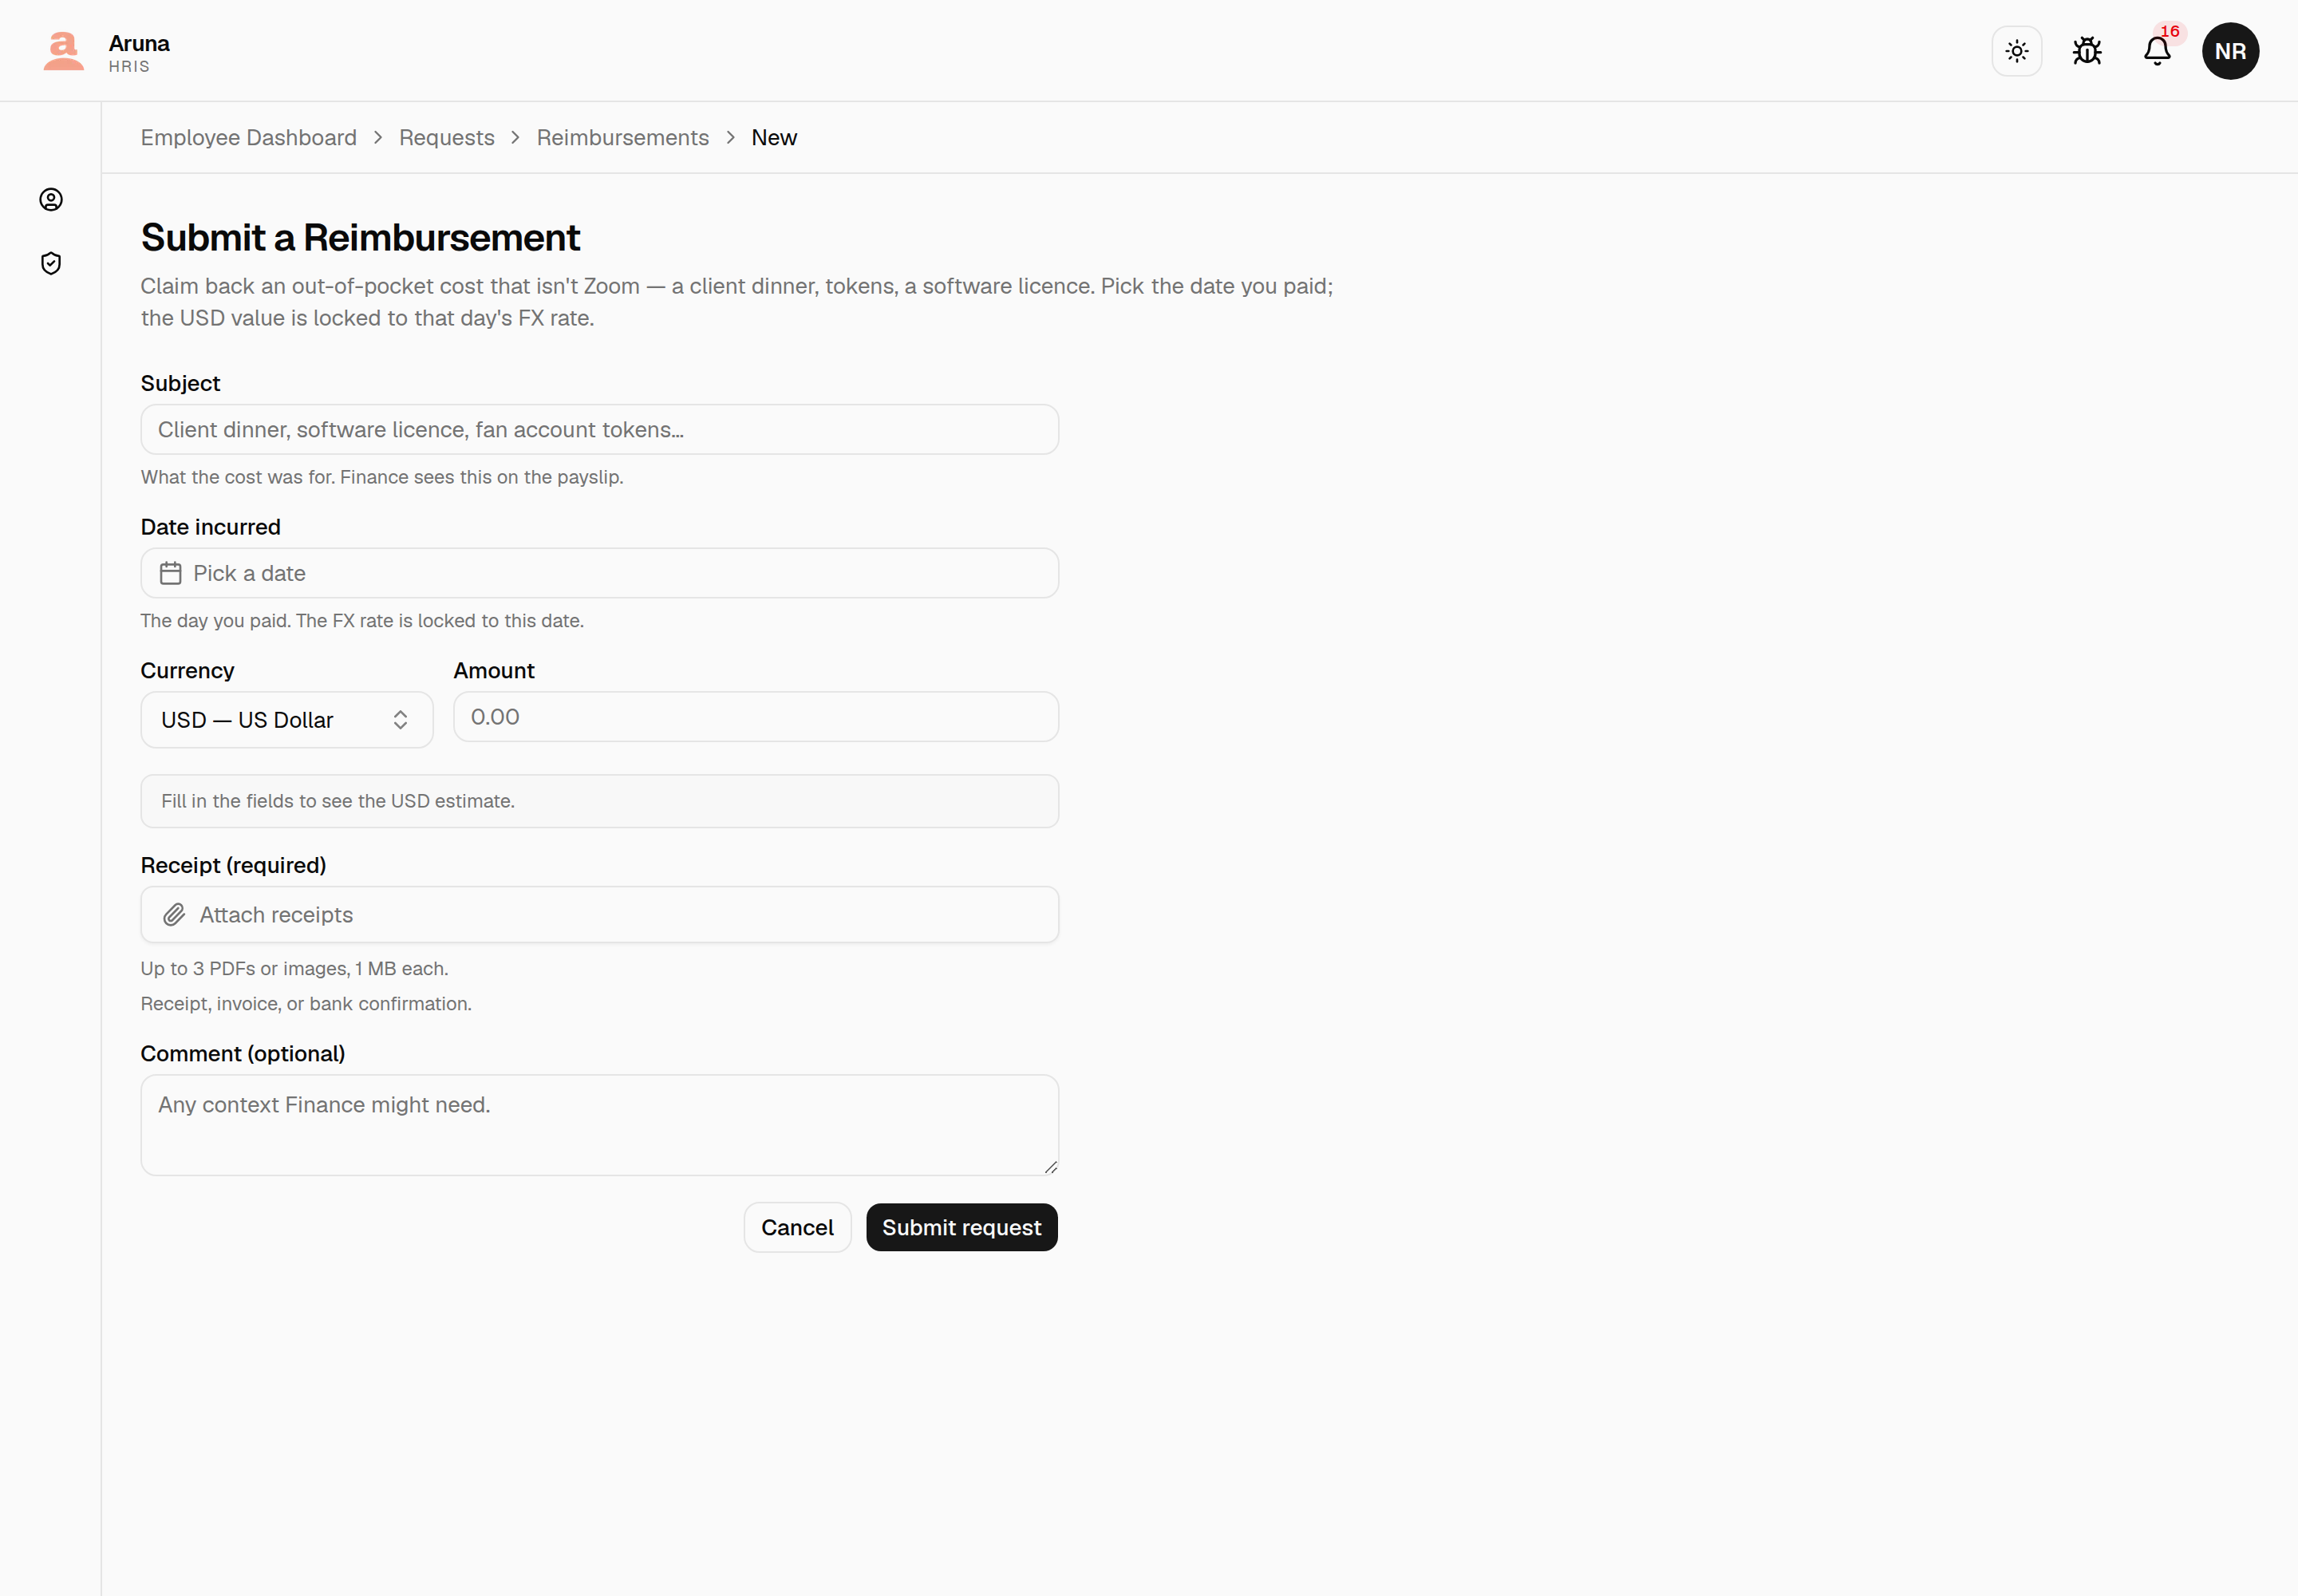
- Subject is what the cost was for, in your own words. Finance sees it on the payslip line, so "Client dinner — Q3 review" beats "expenses".
- Pick the date you paid. As with Zoom, the USD value is locked to that day's FX rate, not the rate on the day you file.
- A receipt is required — up to 3 files, 1 MB each, as PDF or image. A receipt, an invoice, or a bank confirmation all work.
- Comment is optional; use it for anything Finance would otherwise have to ask about.
- Finance reviews it — there's no manager step. If it's rejected you'll get the reason, and you can fix it and submit again.
Tracking what you've claimed¶
My Requests → Additional Reimbursements lists everything you've filed, with the cutoff each one landed in and where it's got to.
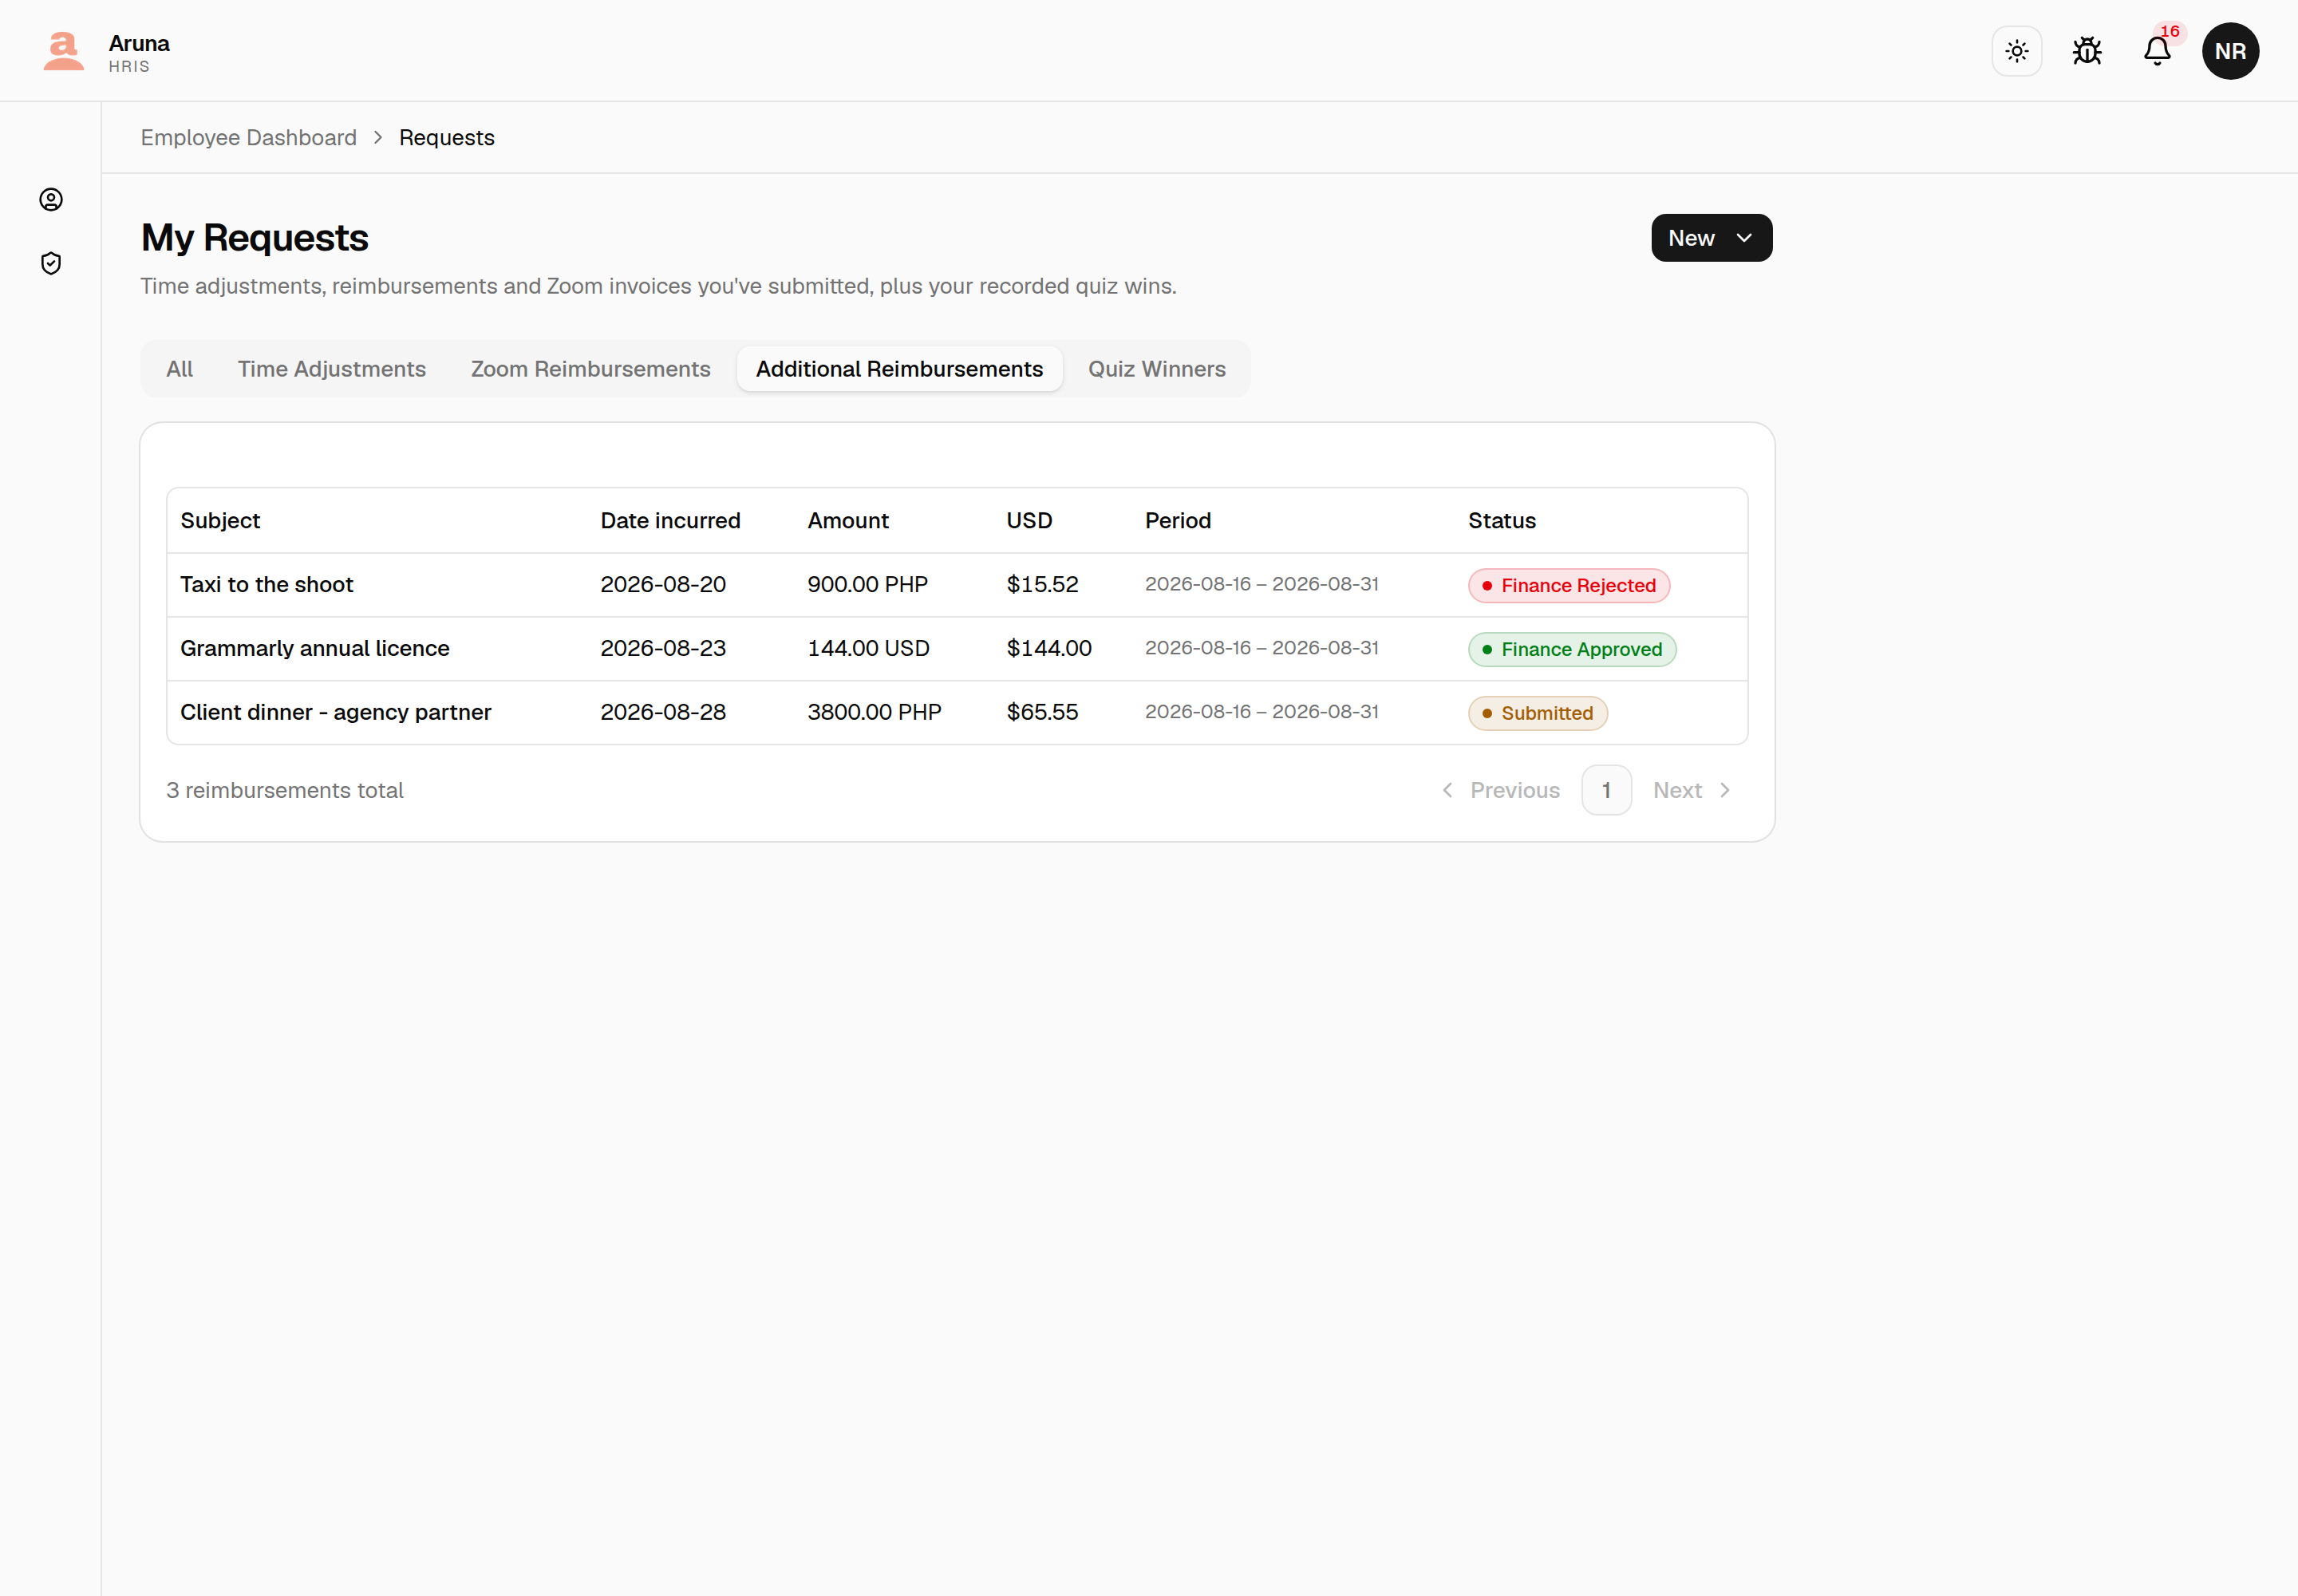
- Submitted — waiting on Finance. Open the row and you can still cancel it while it's in this state.
- Finance Approved — it's on the payslip for that period.
- Finance Rejected — open the row to read Finance's note, then submit a corrected claim.
Click any row to see the full detail: the receipts you attached, the FX amount that was locked, and the approval log.
7. Request leave & check your balance¶
Open My Leave.
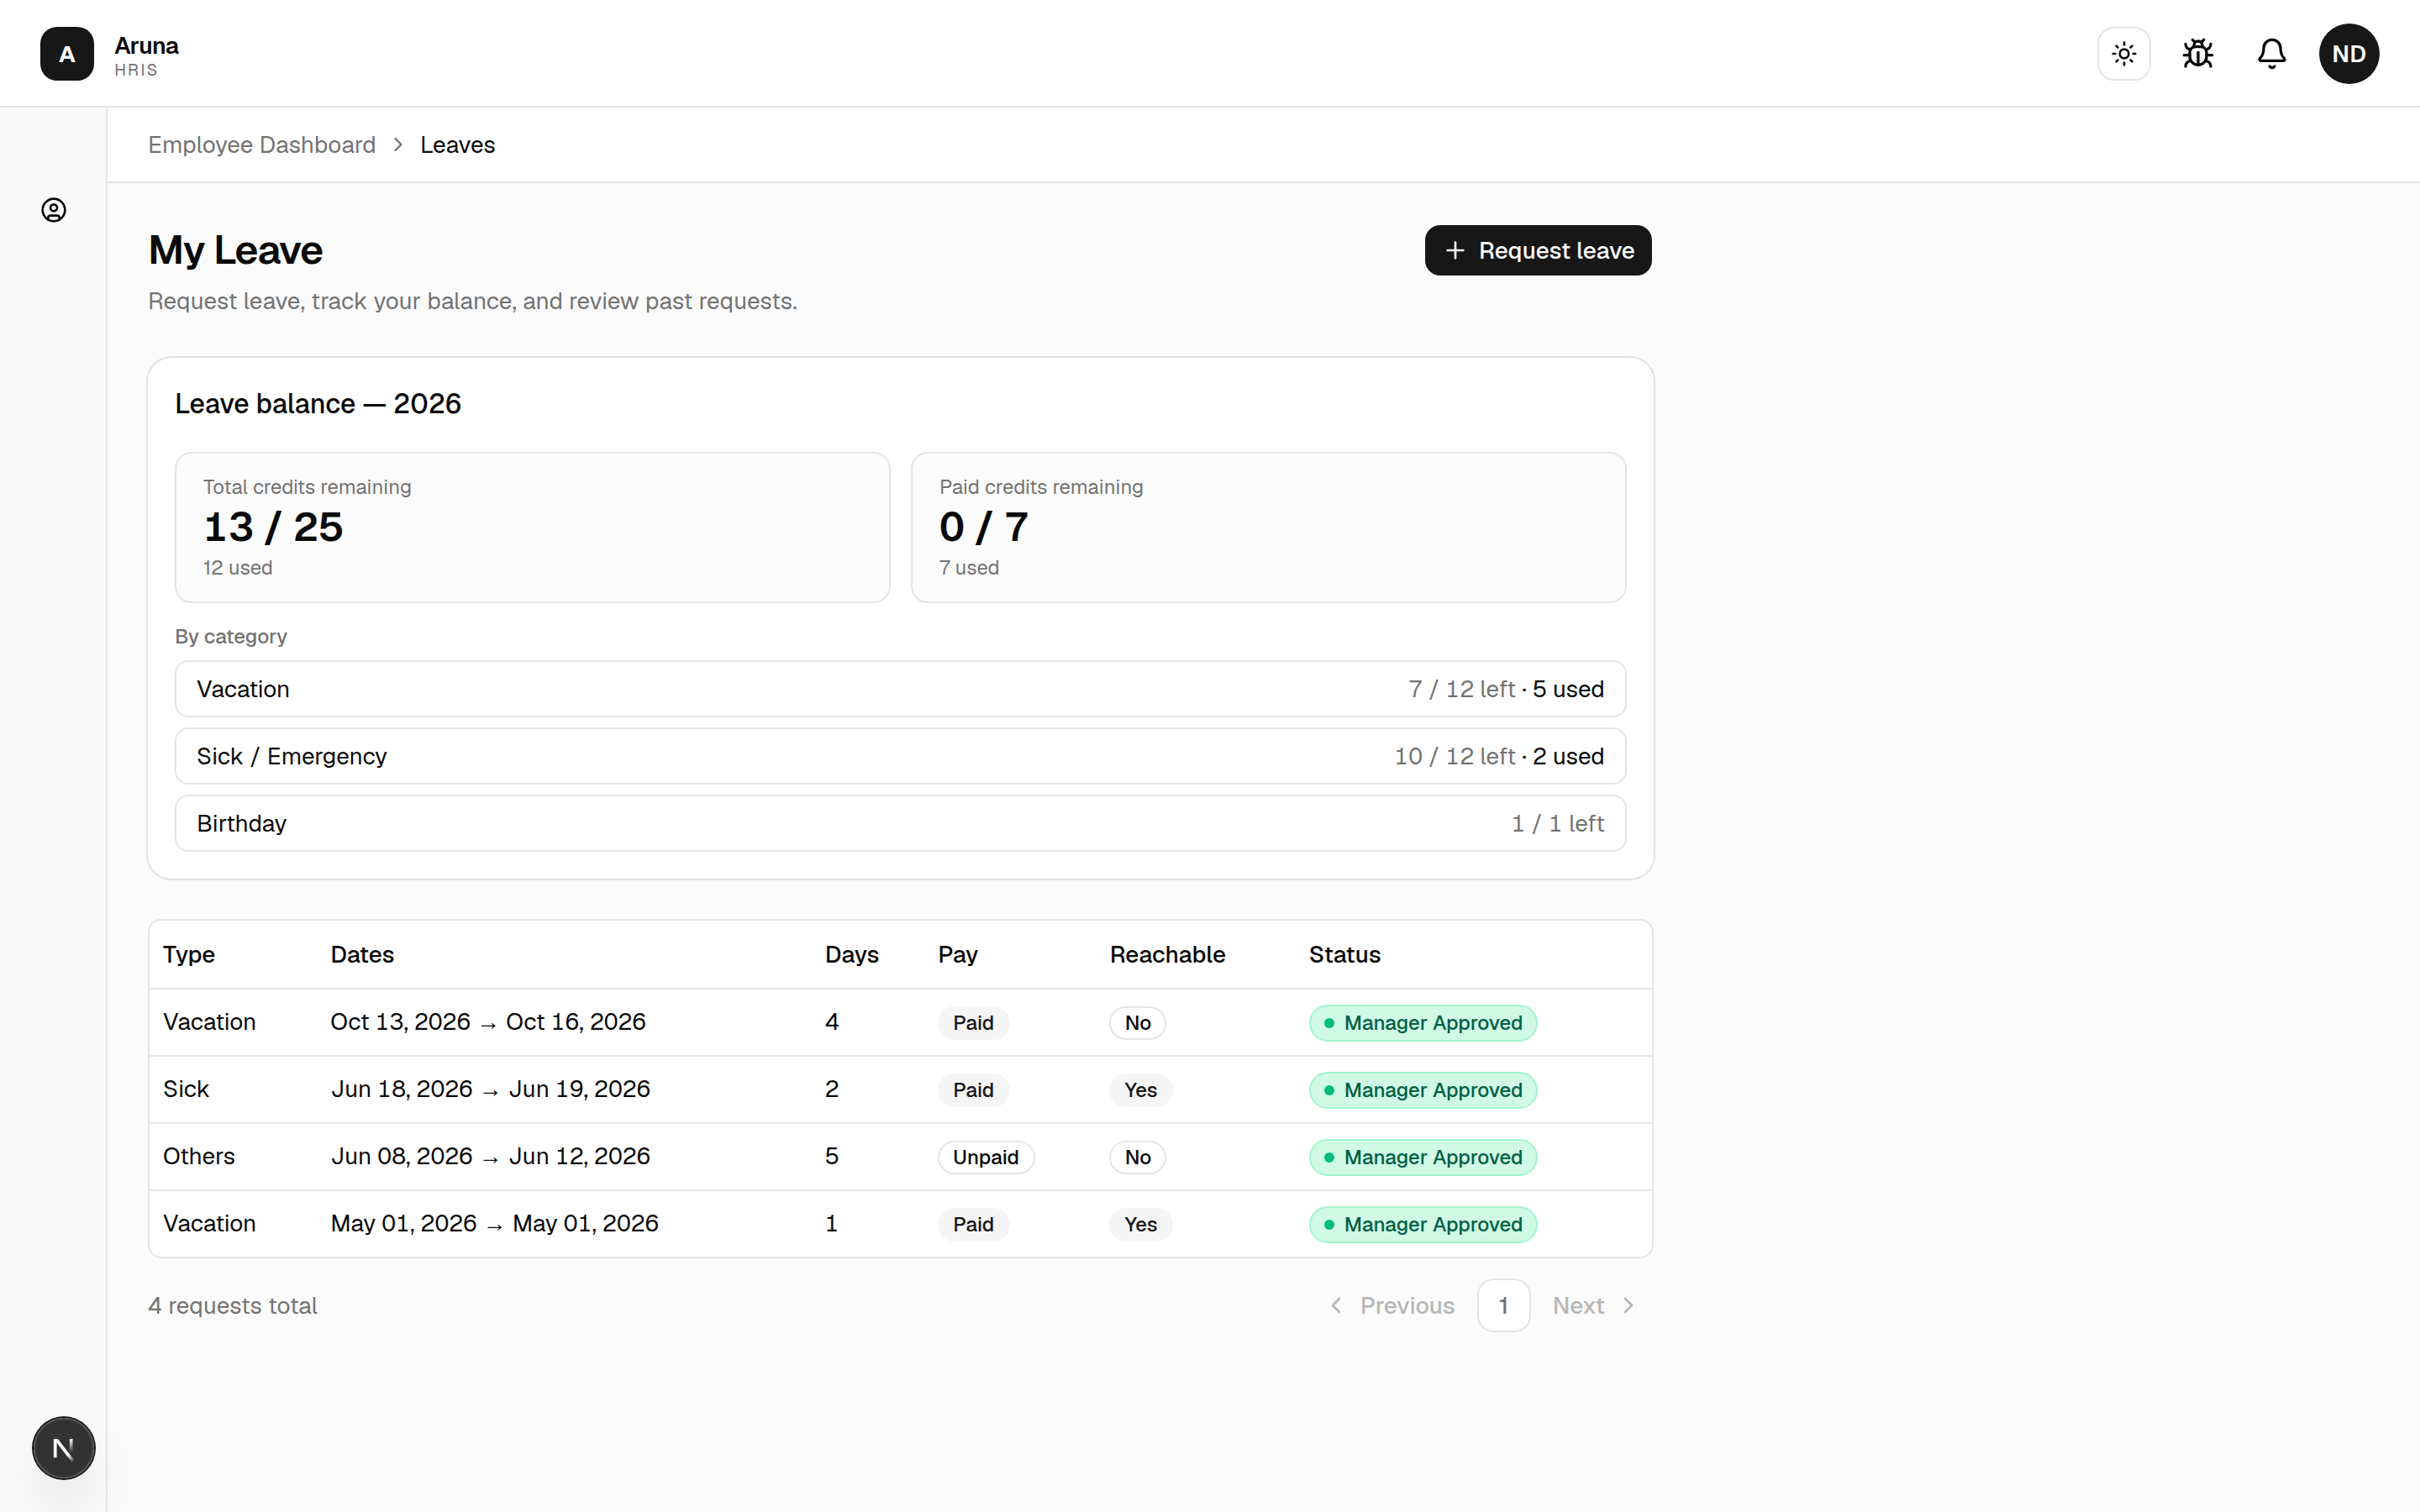
- Leave balance shows your total and paid credits remaining, broken down by Vacation, Sick / Emergency, and Birthday.
- Paid credits unlock after 3 months. Your paid leave credits become available once you've been with Aruna for 3 months (regular employees). Until then the balance card shows when they unlock — "…unlock once you reach 3 months with Aruna — available from <date>" — and you can still file unpaid leave in the meantime. (New hires still on probation don't see this note yet — paid leave opens up after you're regularised.)
- The table lists every request with its Type, the Model it's assigned to (if any), its Pay (Paid/Unpaid), whether you're Reachable, and its Status.
To file a new one, click Request leave:
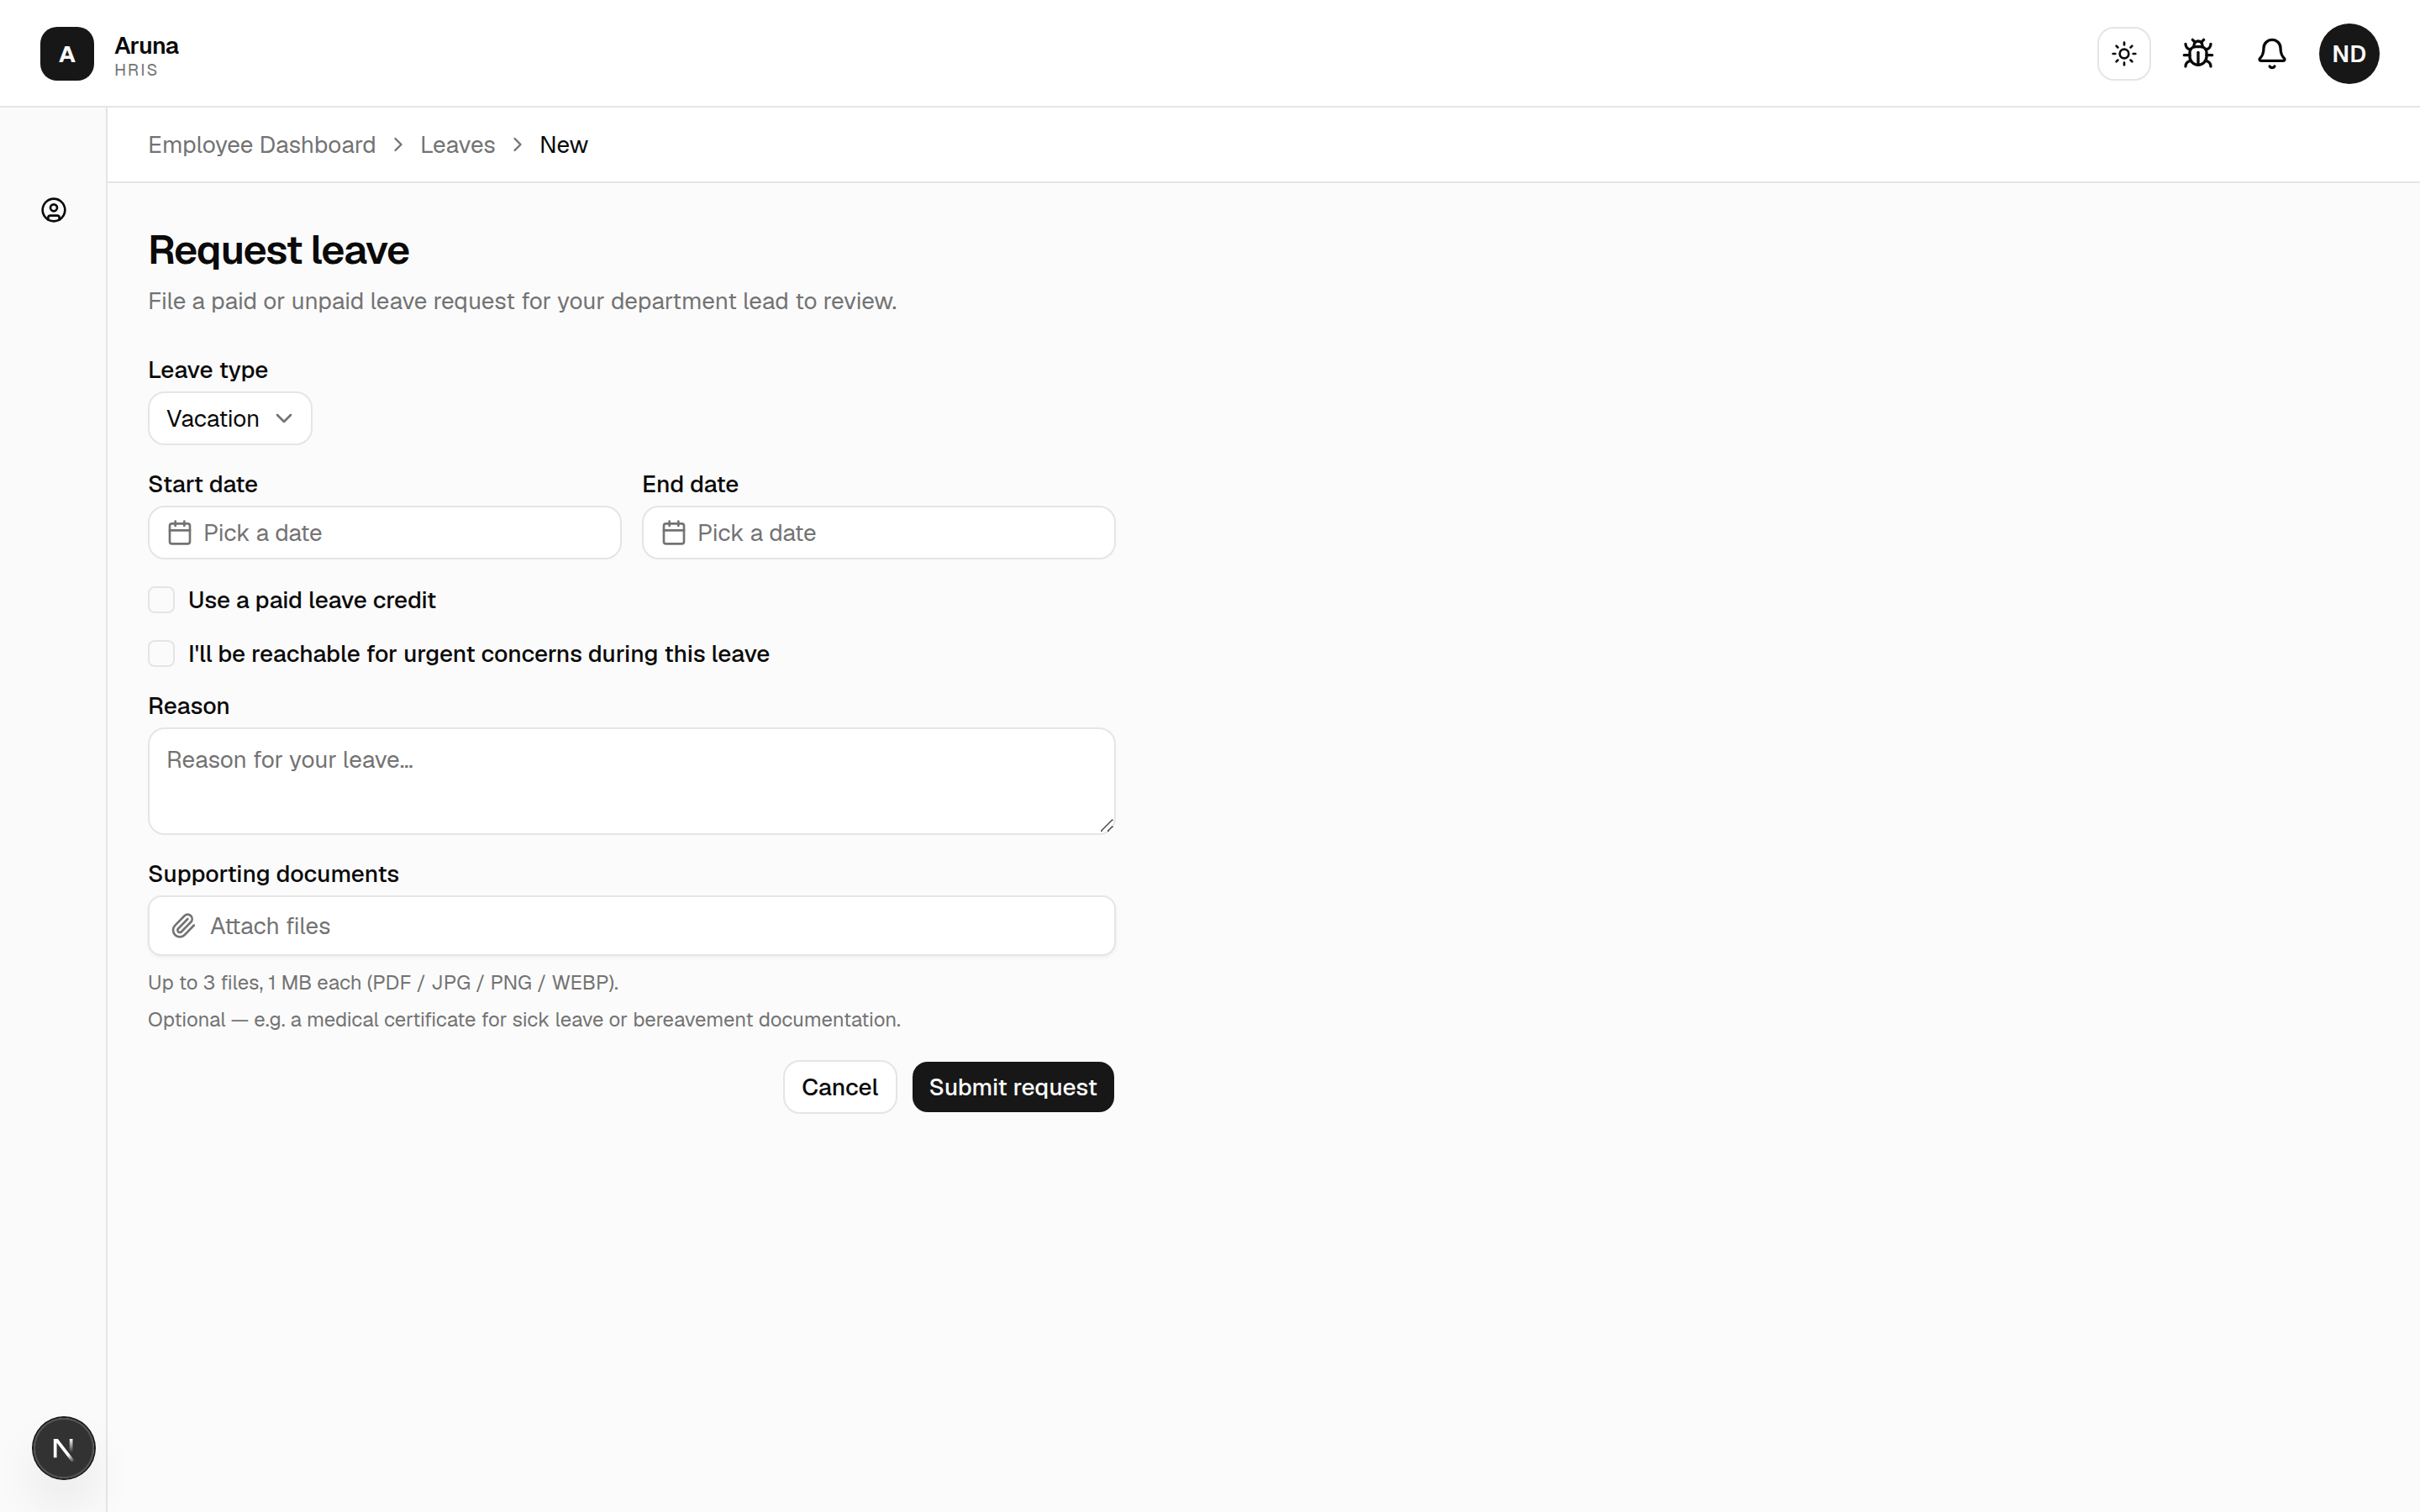
- Pick a leave type and date range. Planned leave (vacation, birthday, etc.) can start today or later — same-day filing is allowed; only past start dates are rejected. Sick / emergency leave may be backdated.
- Assigned model (optional) — if the leave relates to a specific model's coverage, search and pick that model here. Leave it blank if it doesn't apply.
- Paid or unpaid — a dropdown that starts on Unpaid. Pick Paid to spend a paid credit. The note underneath tells you where you stand: how many credits you have left, or — when Paid is greyed out — exactly why it isn't available to you (still on probation, paid leave switched off by P&C, tenure not reached yet, or credits used up for the year).
- Your choice here is a request, not the final answer. Your manager settles paid vs unpaid when they approve, and they can change it either way. If they do, the approval email says so outright.
- Tick I'll be reachable if you can be contacted for urgent concerns.
- Add a reason and any supporting documents (e.g. a medical certificate).
- Submit — your department lead reviews it (single-stage approval).
Cancelling leave. You can cancel a leave request while it's still pending and before its start date. Once your manager approves it, it can no longer be cancelled — talk to your manager if plans change.
8. Payslips & disputes¶
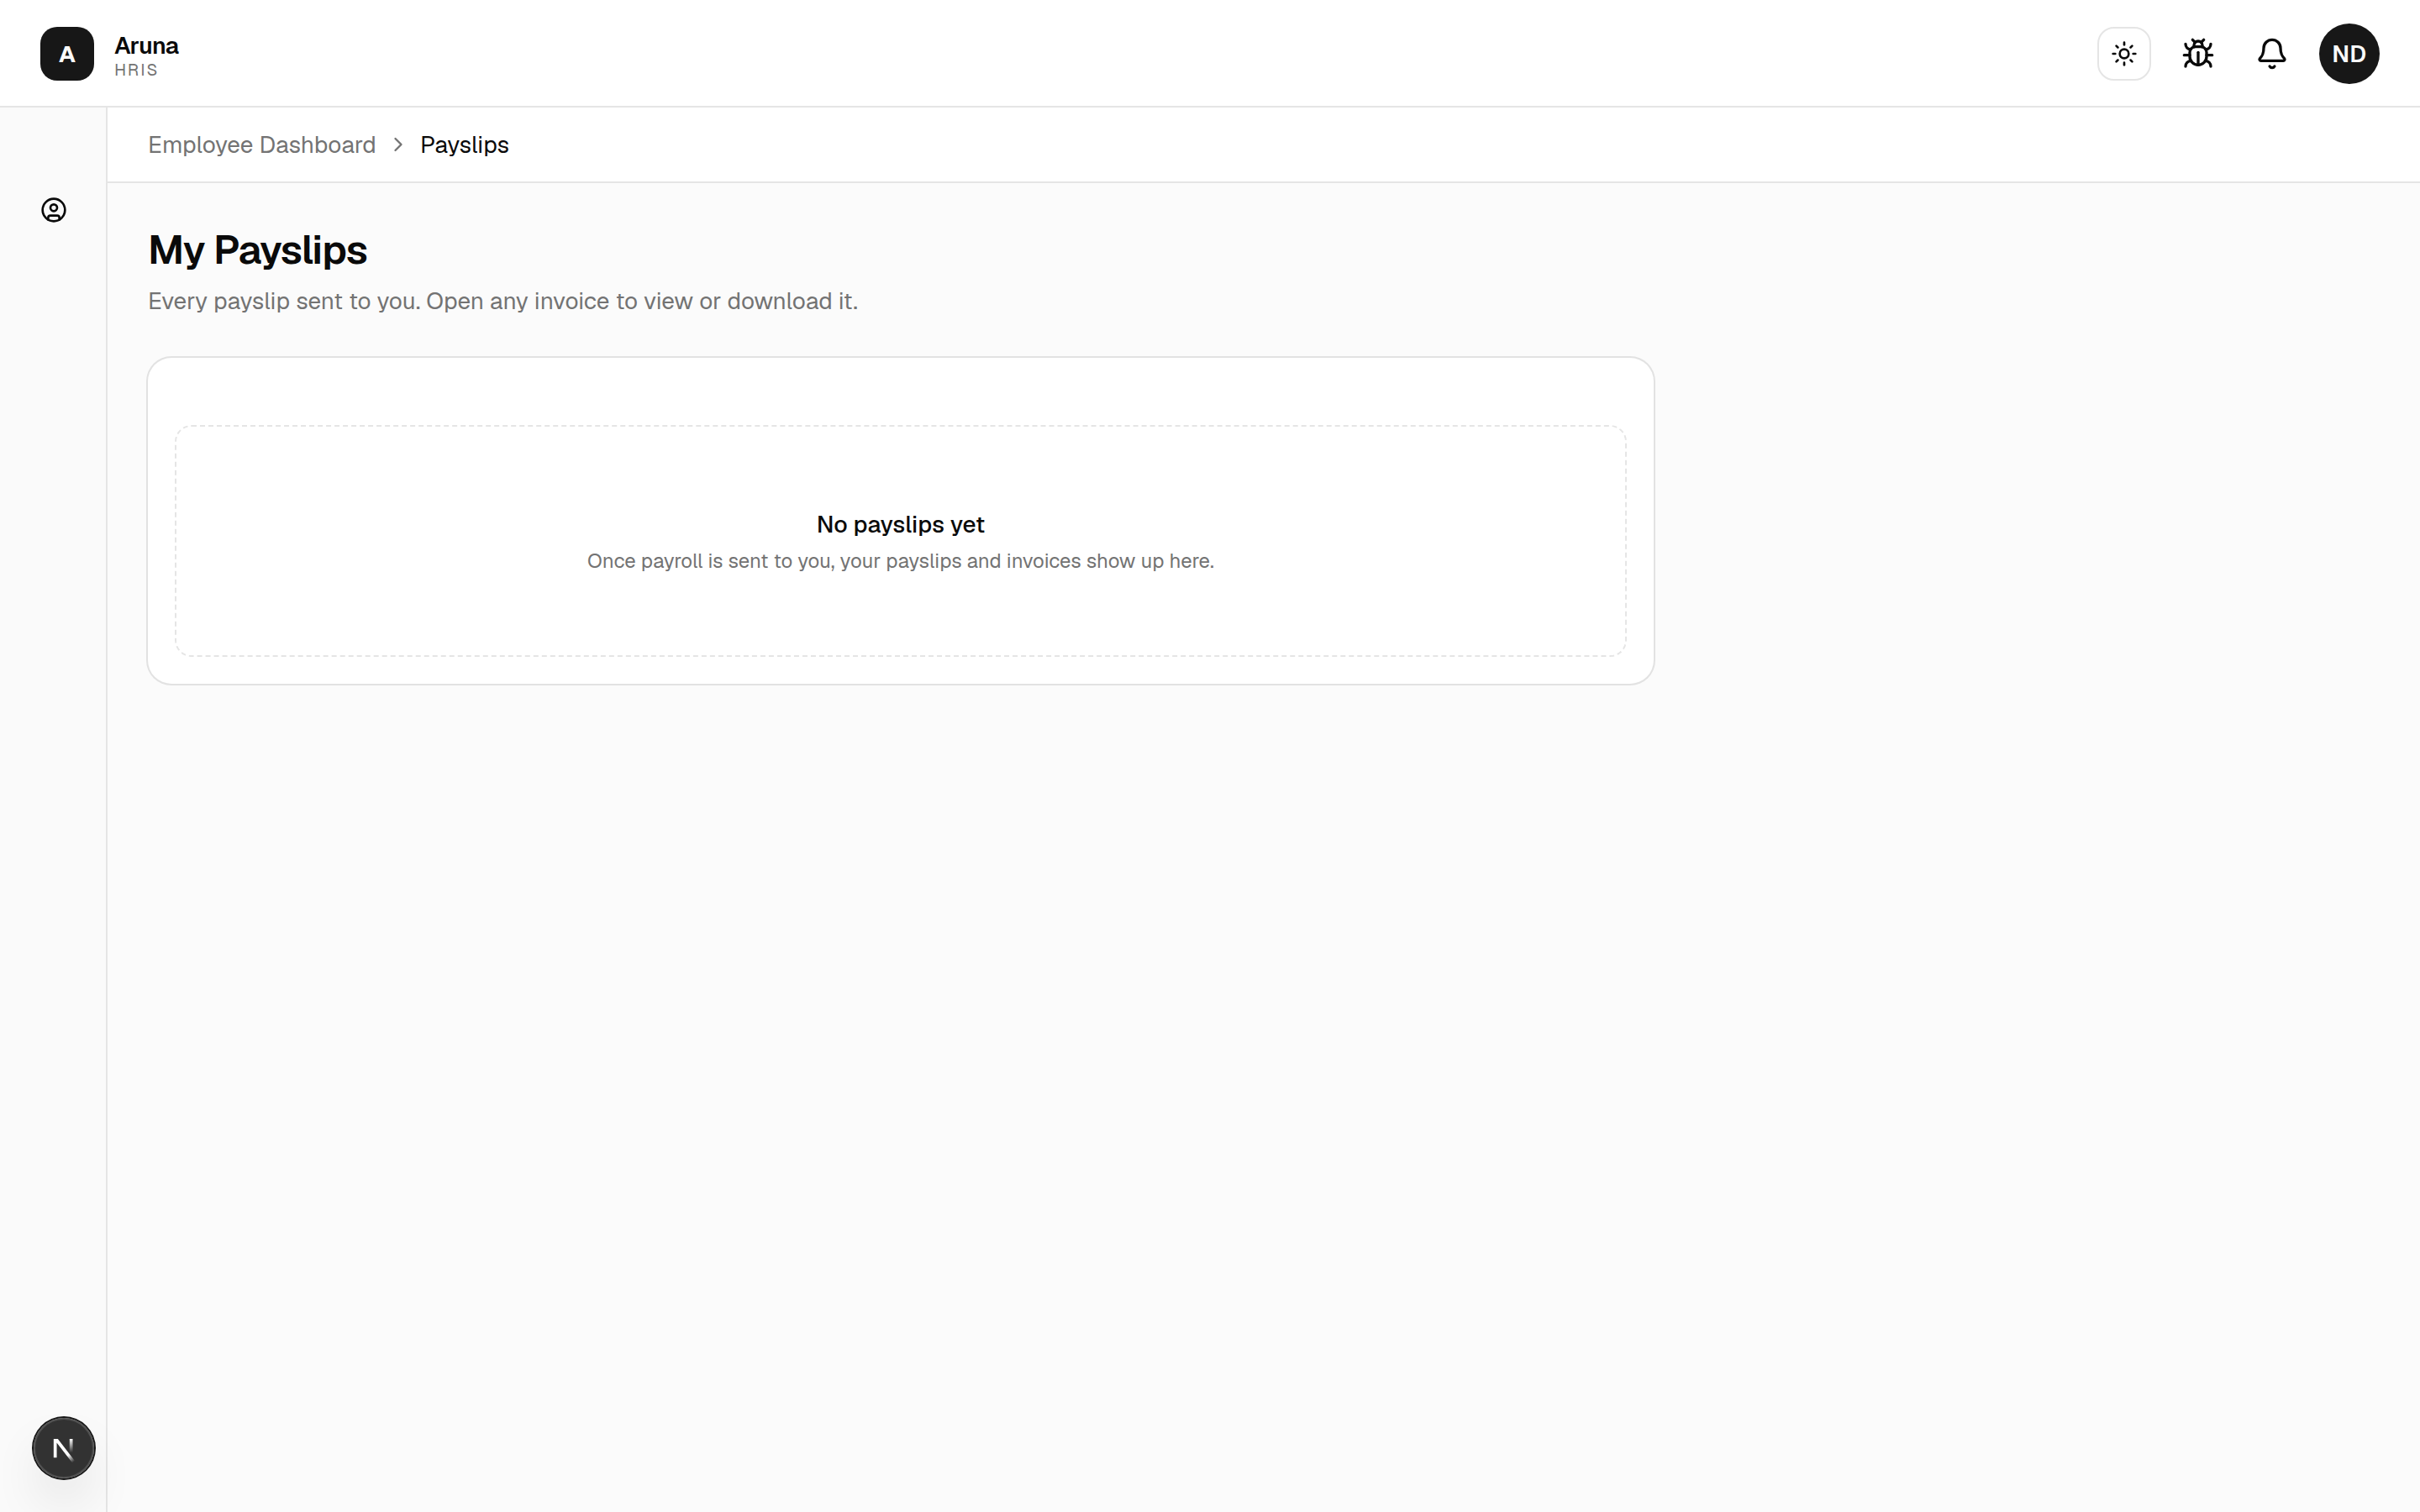
- My Payslips — every payslip sent to you. Open any invoice to view or download it. (Empty until your first payroll is sent.)
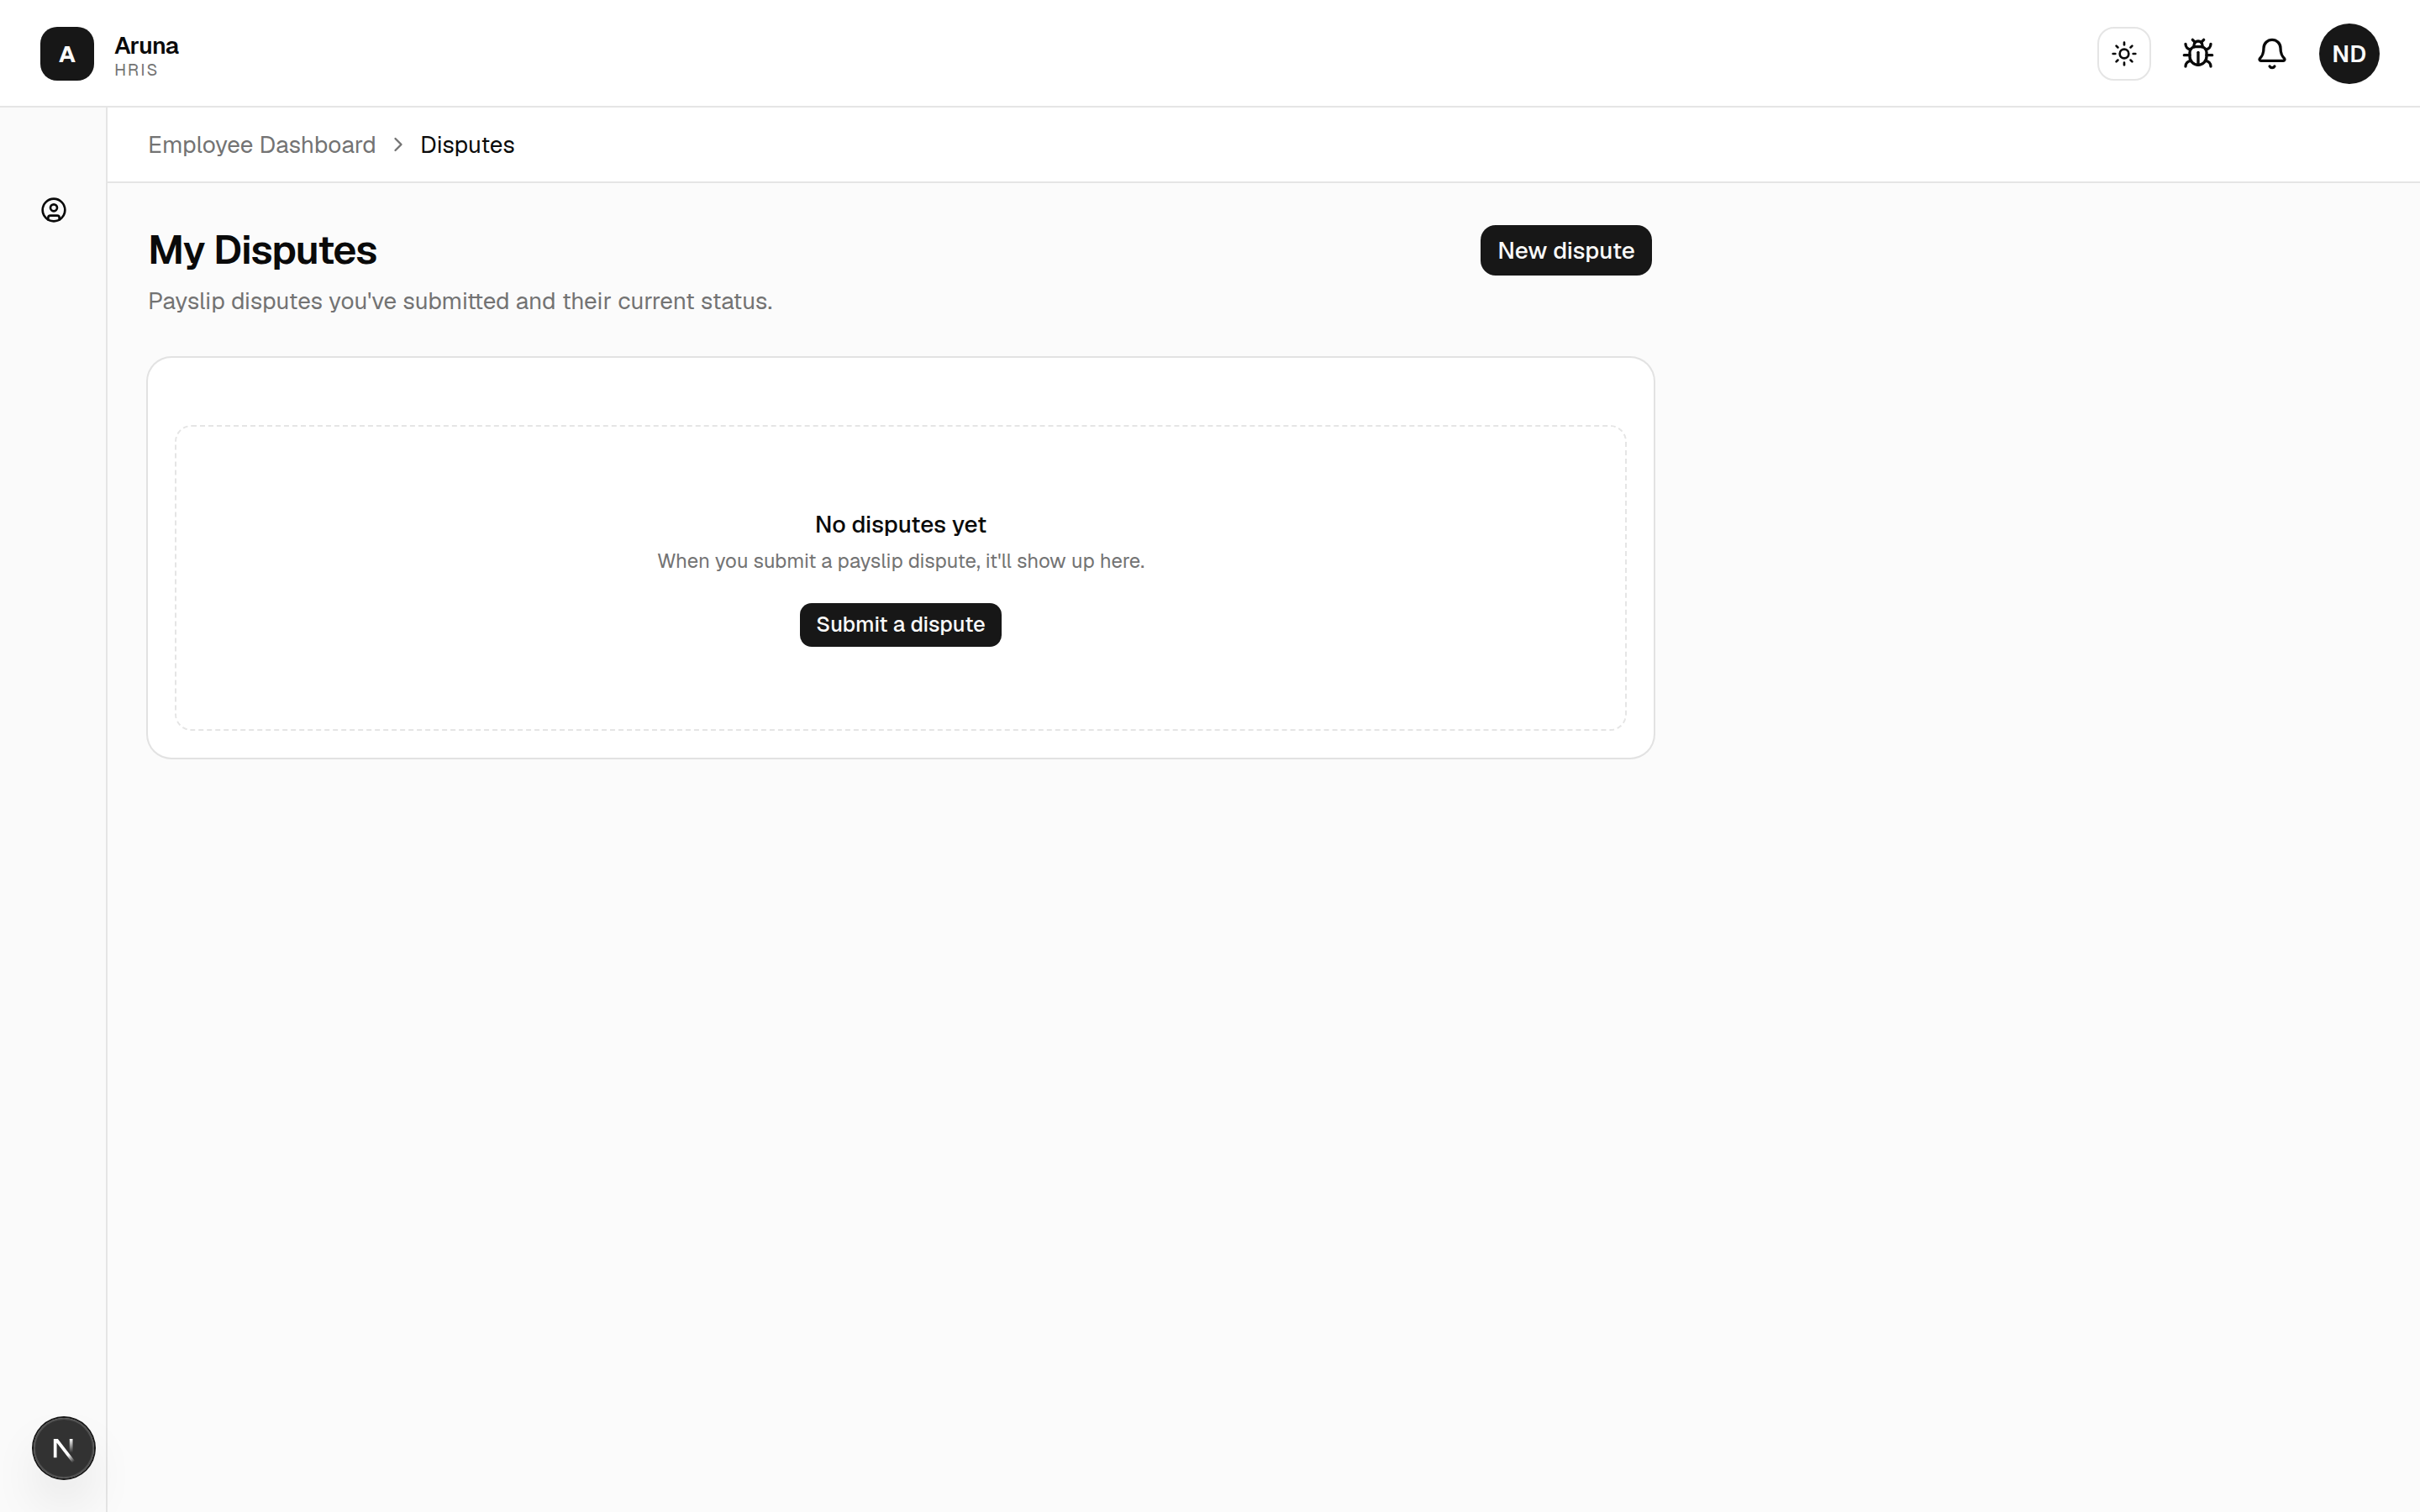
- Payslip Disputes — if a payslip looks wrong, click New dispute, explain the issue, and submit. P&C/Finance follow up.
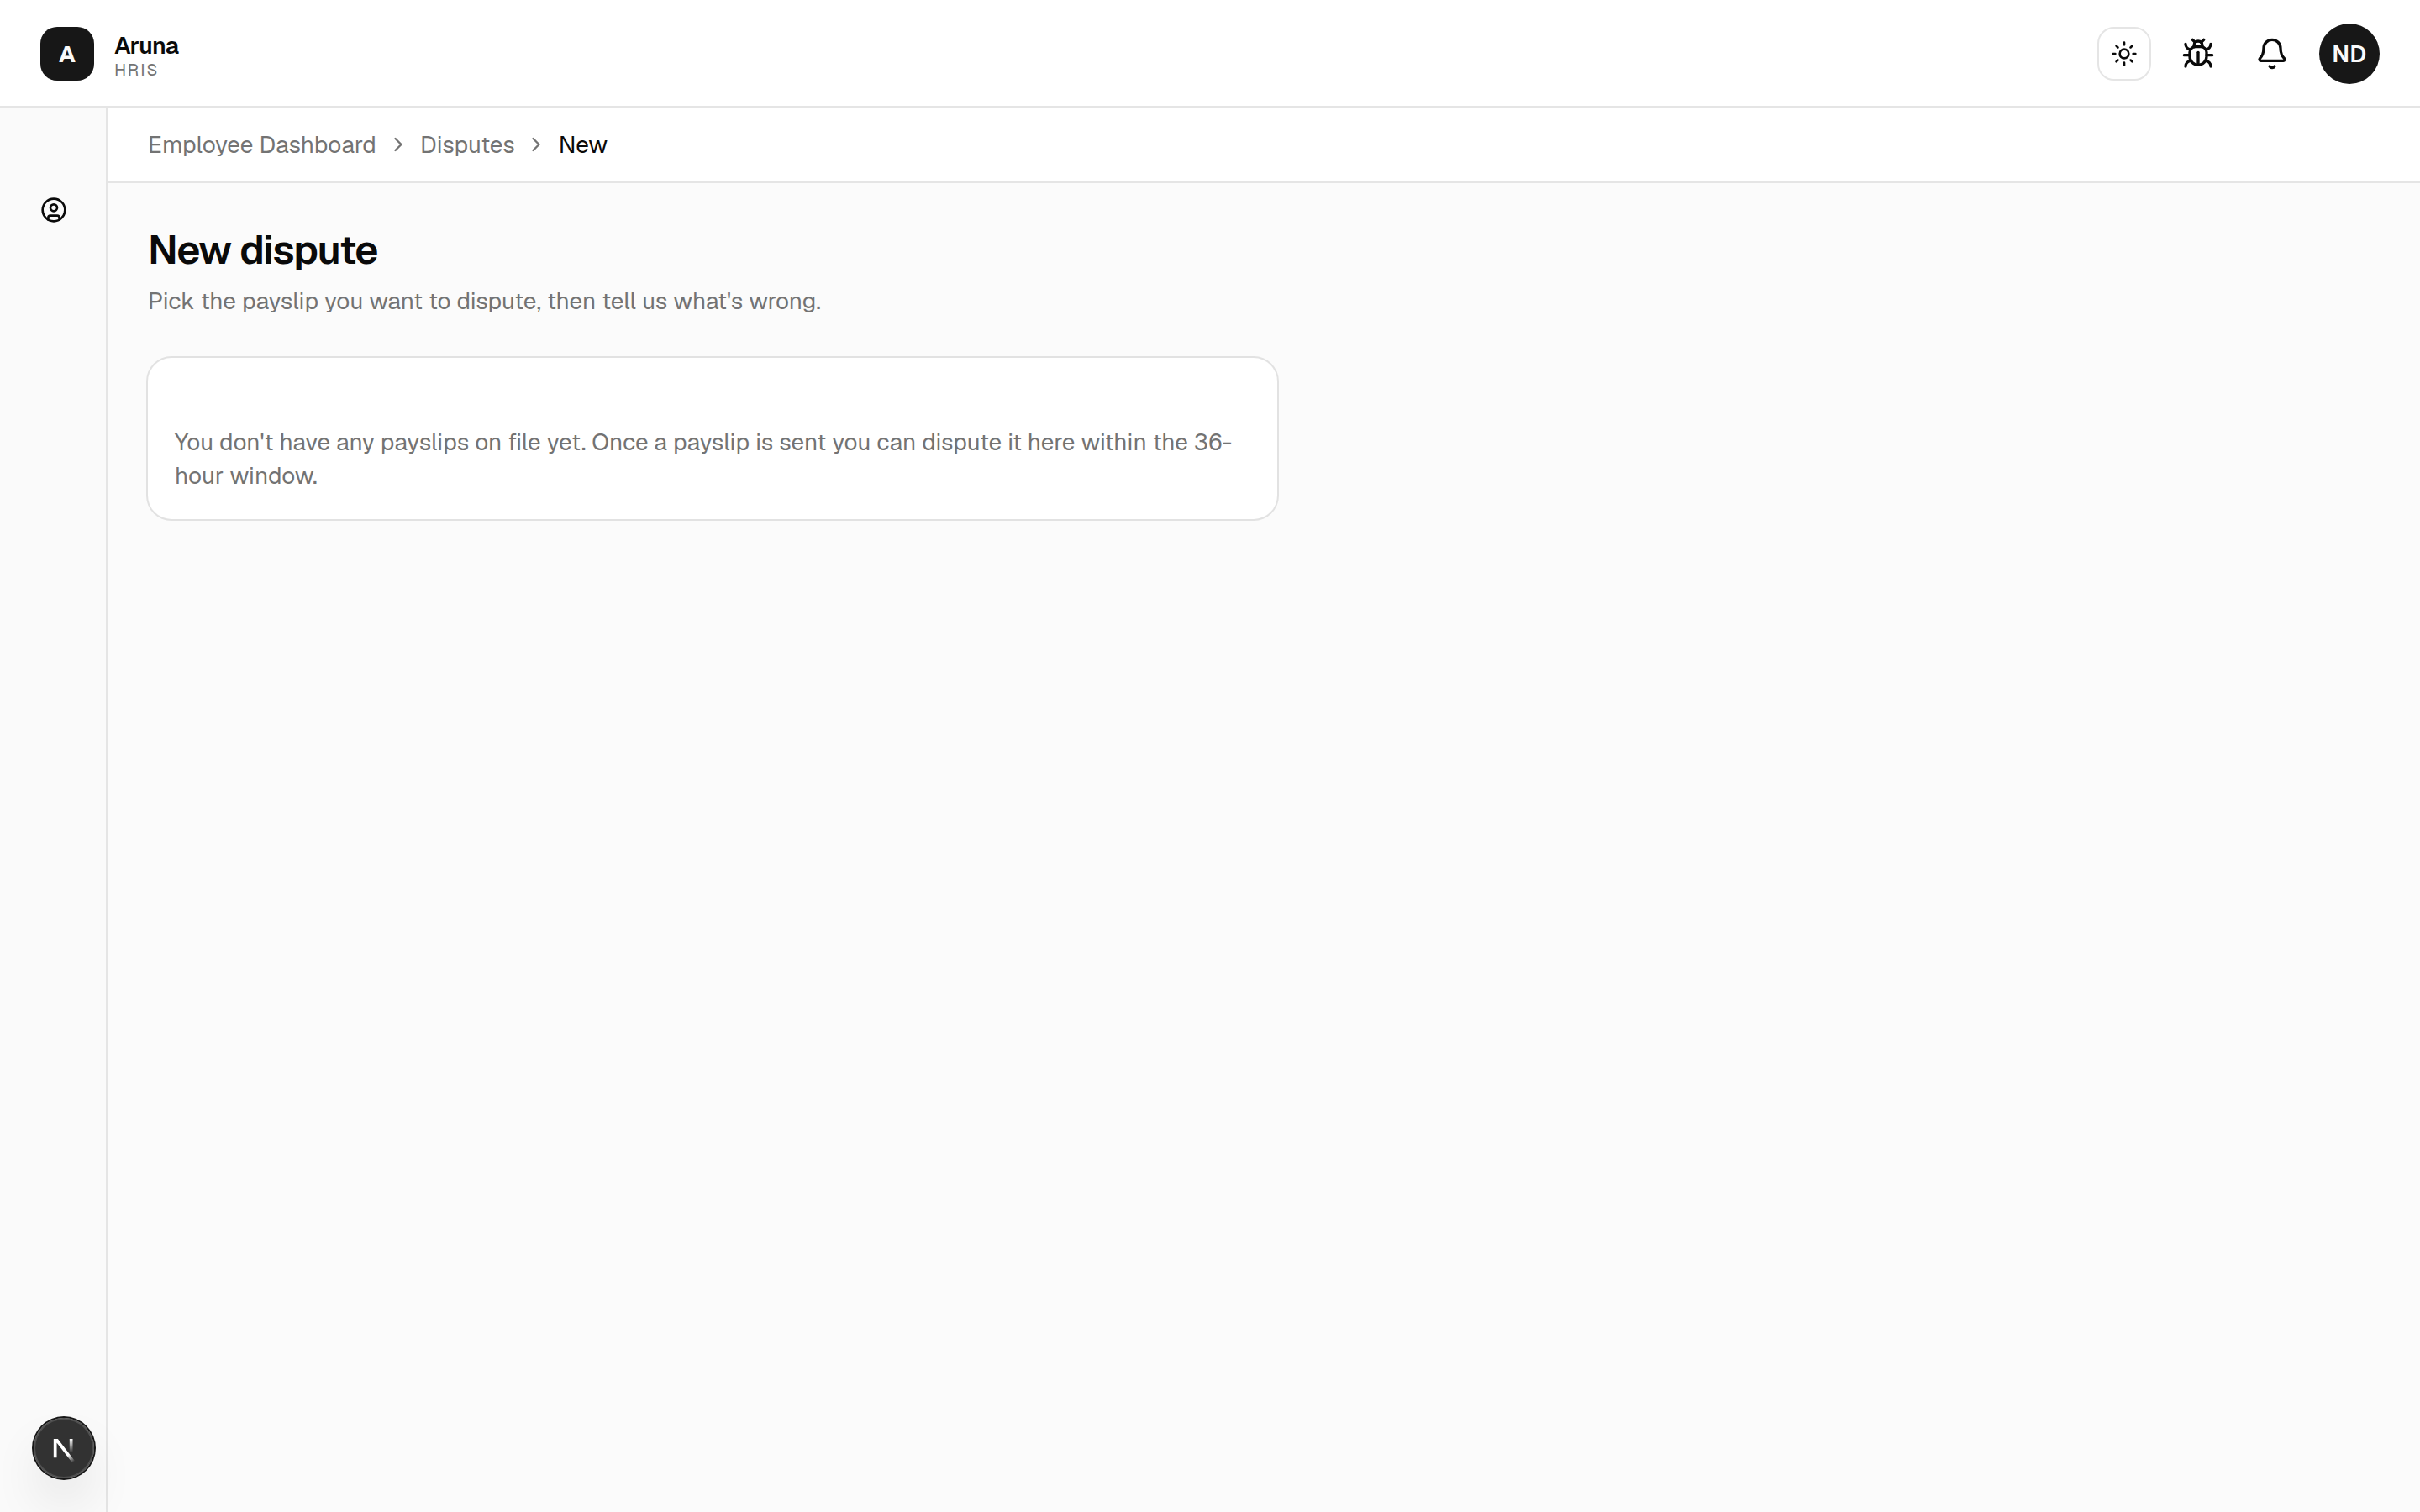
On New dispute you pick the payslip you're disputing, then describe what's wrong. You can only dispute a payslip within 36 hours of it being sent, so raise it promptly.
9. Your documents¶
Your dashboard shows a Documents card with your 3 most recent files; click View all documents there (or the My Documents quick action) to open the full list. It shows every file People & Culture have shared with you — your contract, IDs, signed forms, and similar records. Click any document to open it in a new tab, or use the download icon to save a copy.
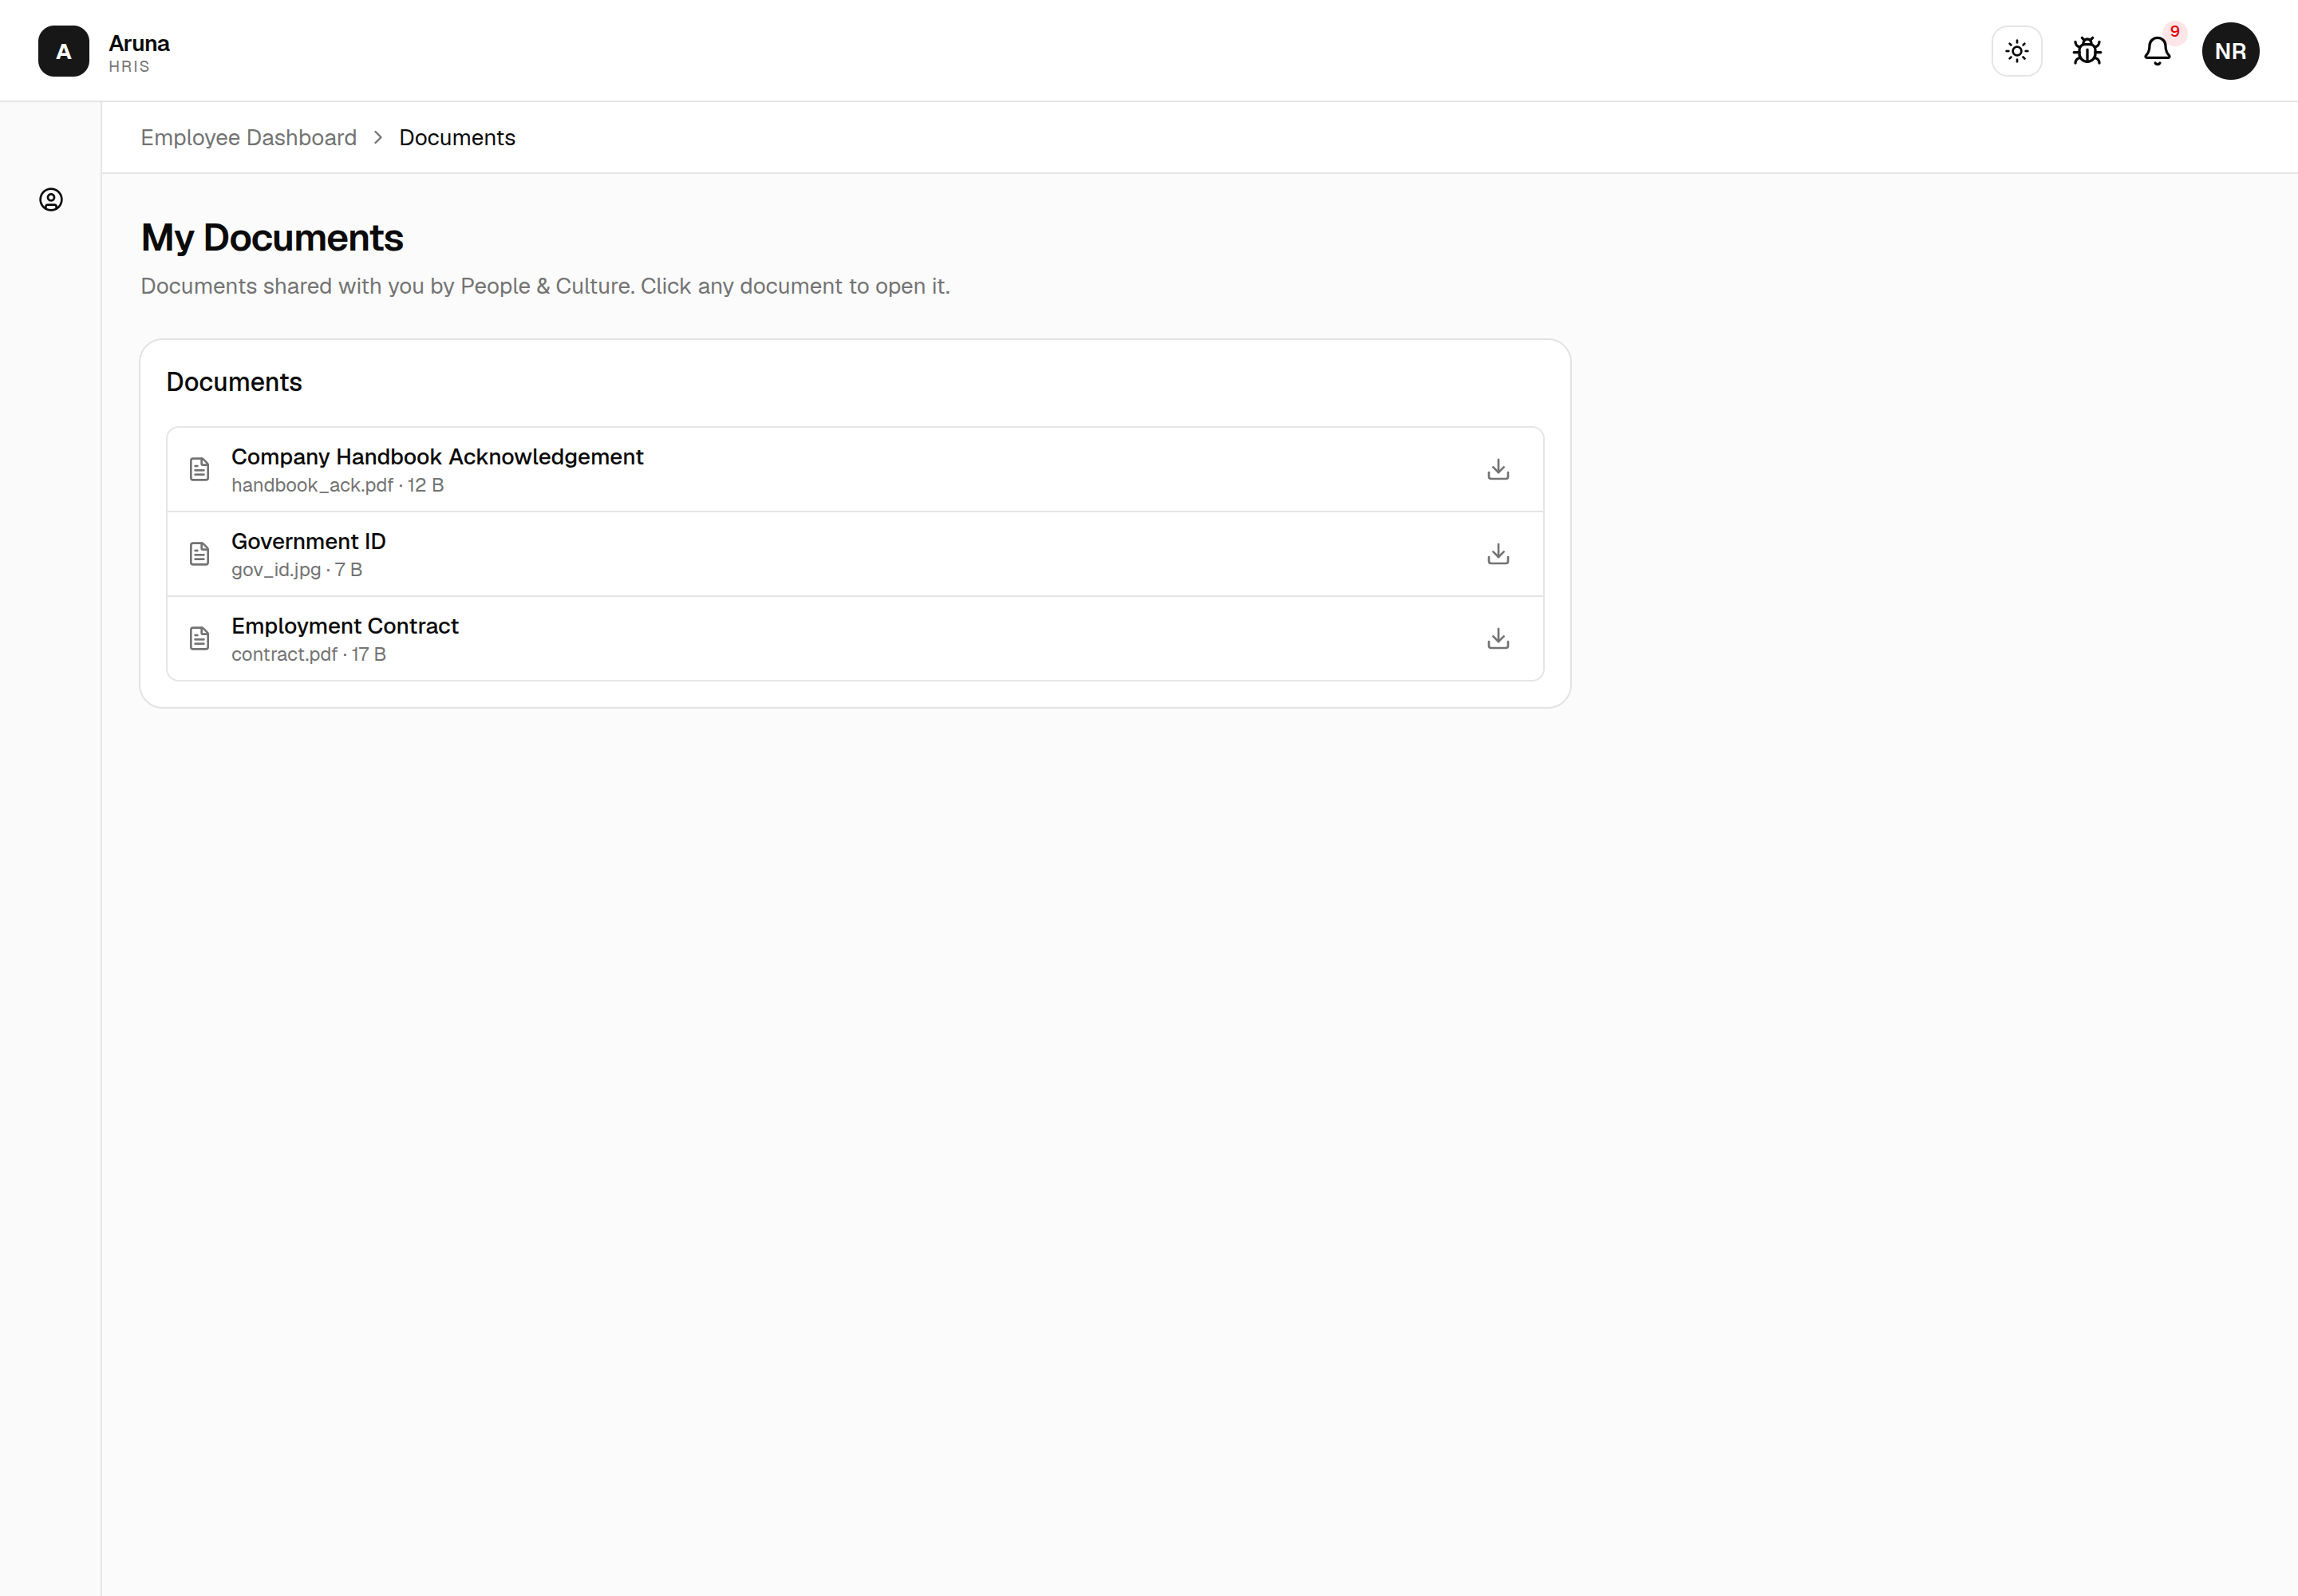
These are managed by P&C — you can view and open them, but only P&C can add or remove documents.
10. Report a bug or send feedback¶
Something not working, or an idea to make the app better? Use the 🐛 bug icon in the top bar (next to the notifications bell) — it's on every page.
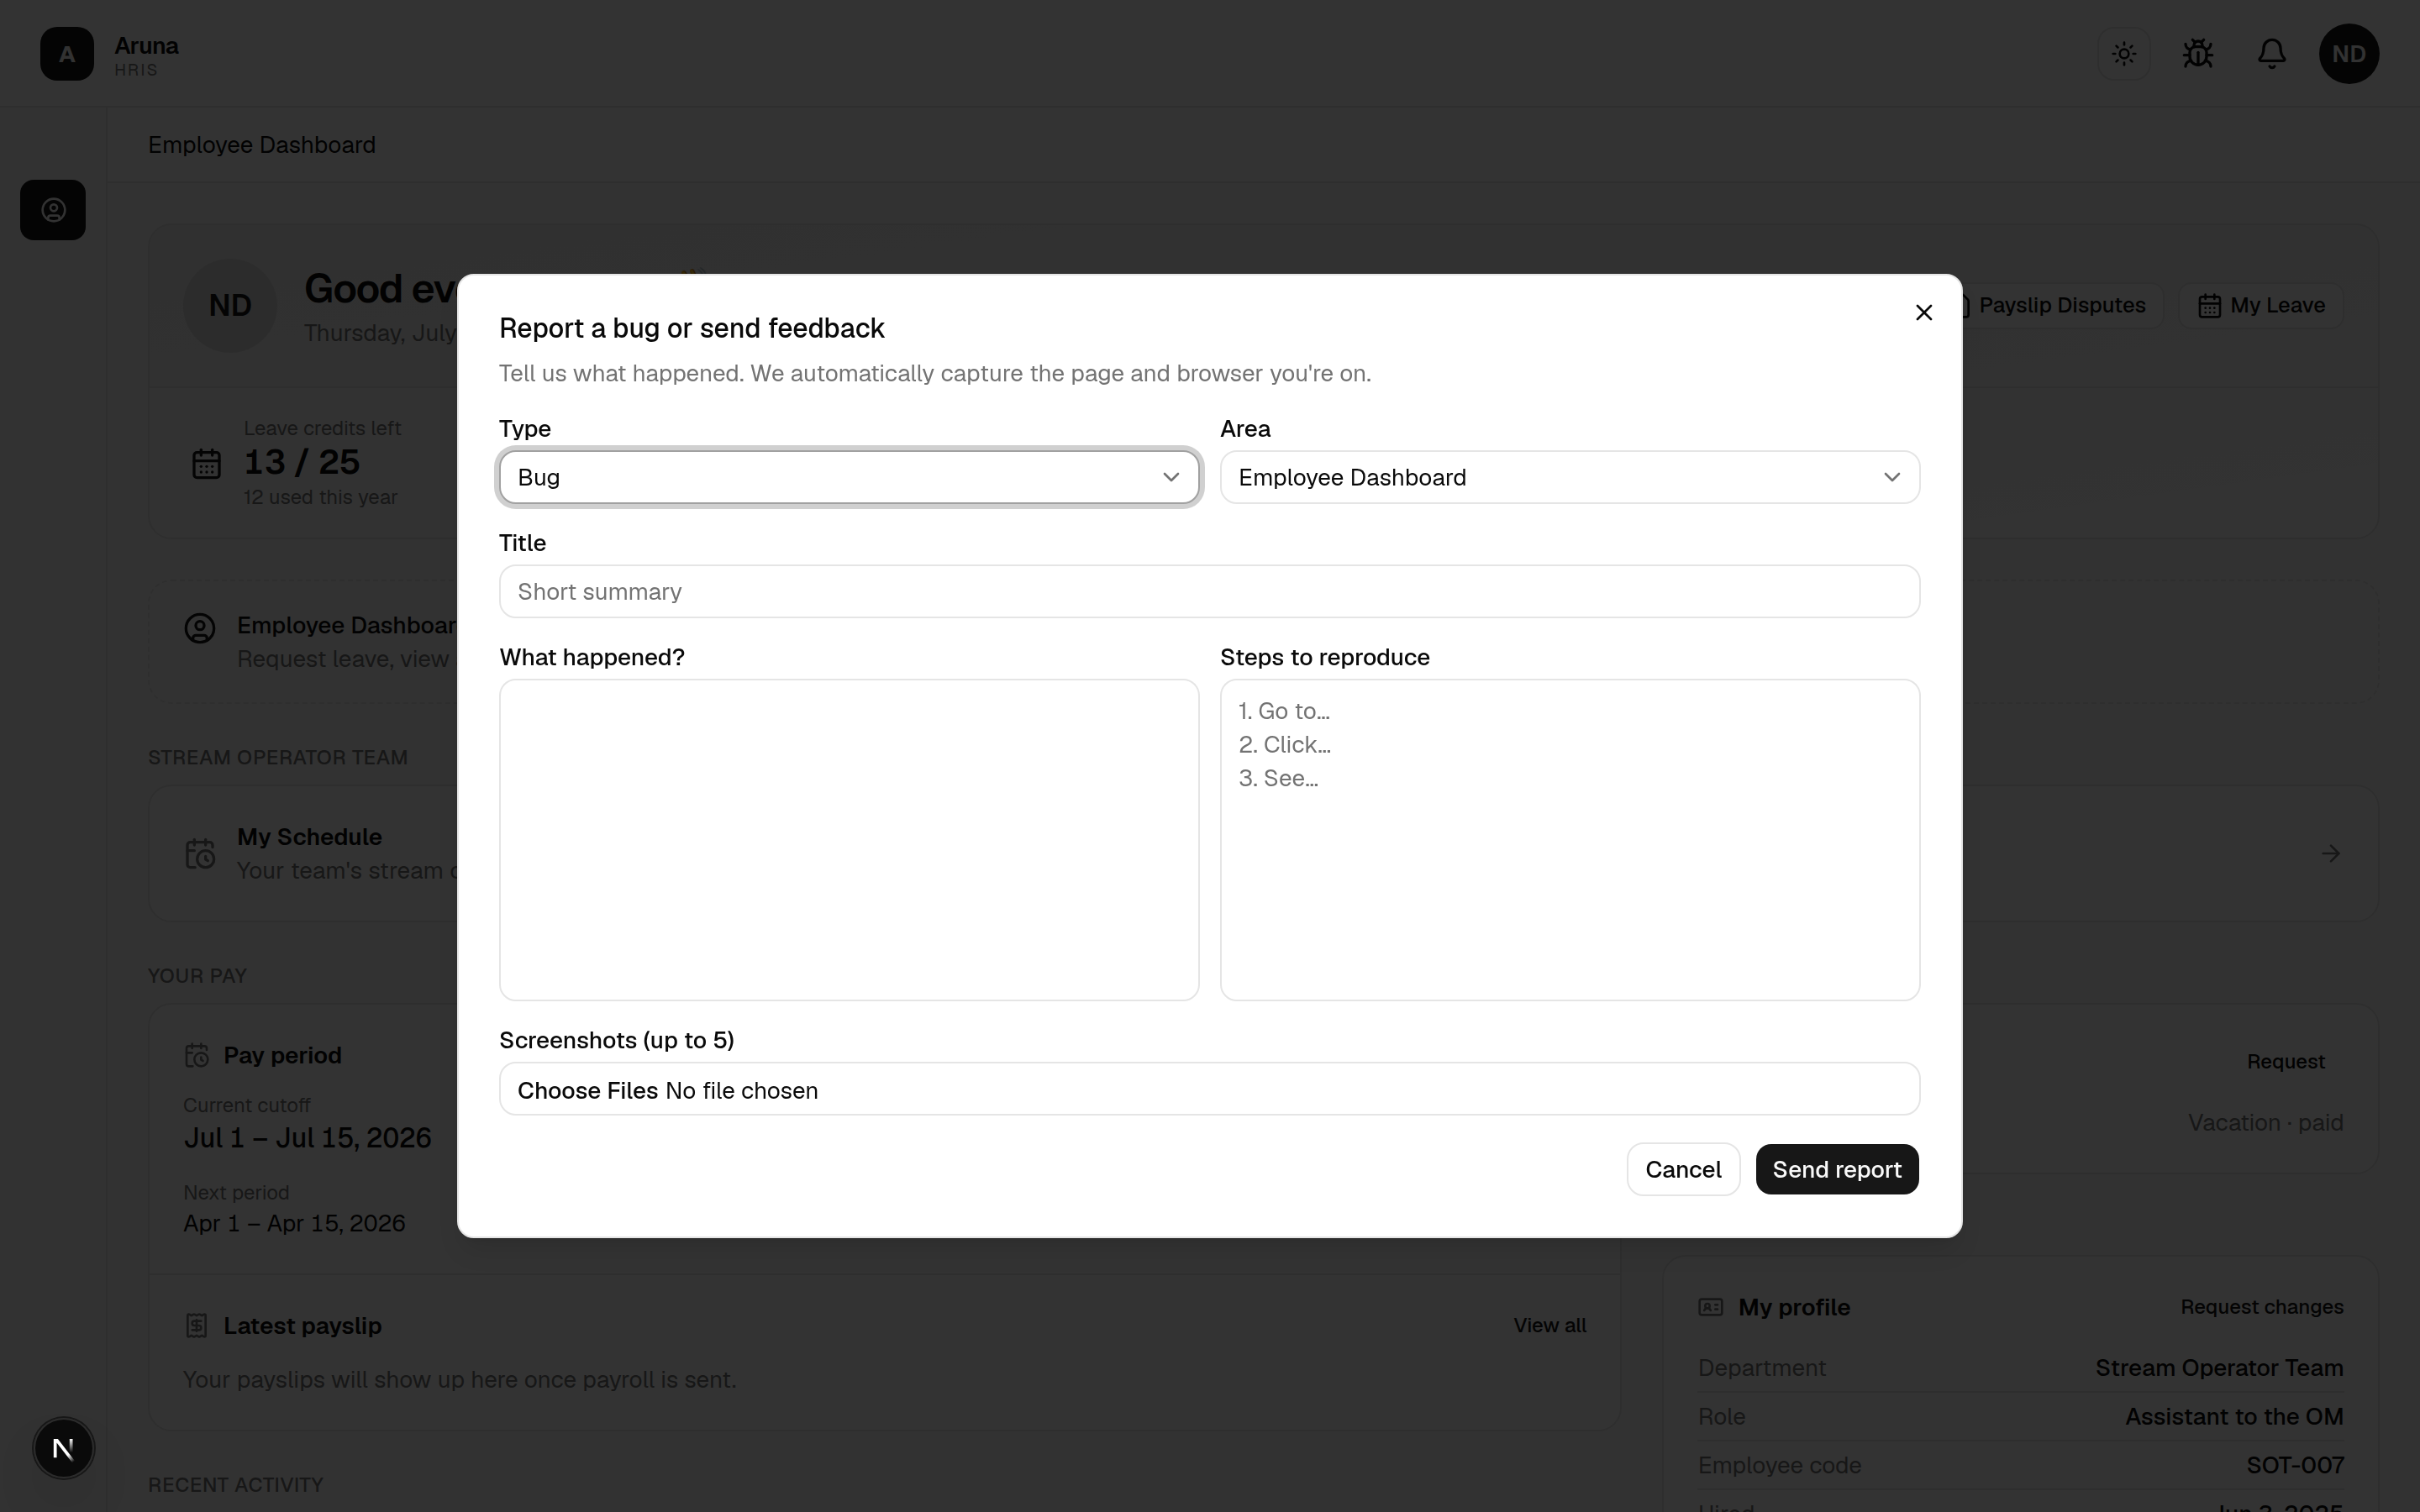
- Type — Bug, Feature request, or Other.
- Area — auto-filled from the page you're on (e.g. Employee Dashboard); change it if your report is about something else.
- Title — a short summary.
- What happened? and Steps to reproduce — the more detail, the faster it's fixed.
- Attach up to 5 screenshots if they help, then Send report.
The app automatically records the page you were on and your browser, so you don't need to include those.
Troubleshooting¶
| Problem | What to do |
|---|---|
| A module/page is missing | Your dashboard only shows what applies to you — ask P&C if something's absent |
| Time adjustment won't accept a date | The date must fall in an active or recently-processed period |
| Leave shows Unpaid unexpectedly | You left the Paid or unpaid dropdown on its Unpaid default, your paid credits are used up, or your manager approved it as unpaid — the approval email says when they changed it |
| Can't use paid leave credits yet | Paid leave unlocks after 3 months with Aruna — the balance card shows your unlock date. You can still file unpaid leave until then |
| Wrong amount on a payslip | Use Payslip Disputes → New dispute |
| Need a name/banking change | Use Request changes on the dashboard — P&C applies it |